
Where: Employer › Employee list › Bulk upload employees. Before you start: your account must be Active.
Prepare the file
Save your list as a CSV file with these columns in the first row, spelled exactly as shown:Download the template
A CSV file with the column headings and two example rows.
- Write dates as YYYY-MM-DD, for example
1992-03-14. - contactPhone is required: every employee gets a SmartPay wallet on import.
- contactEmail is optional, but rows without one get a warning.
- Everyone is imported on the Standard EOSB treatment. Payout accounts are not uploaded; add them later in Update employee records.
Upload and check
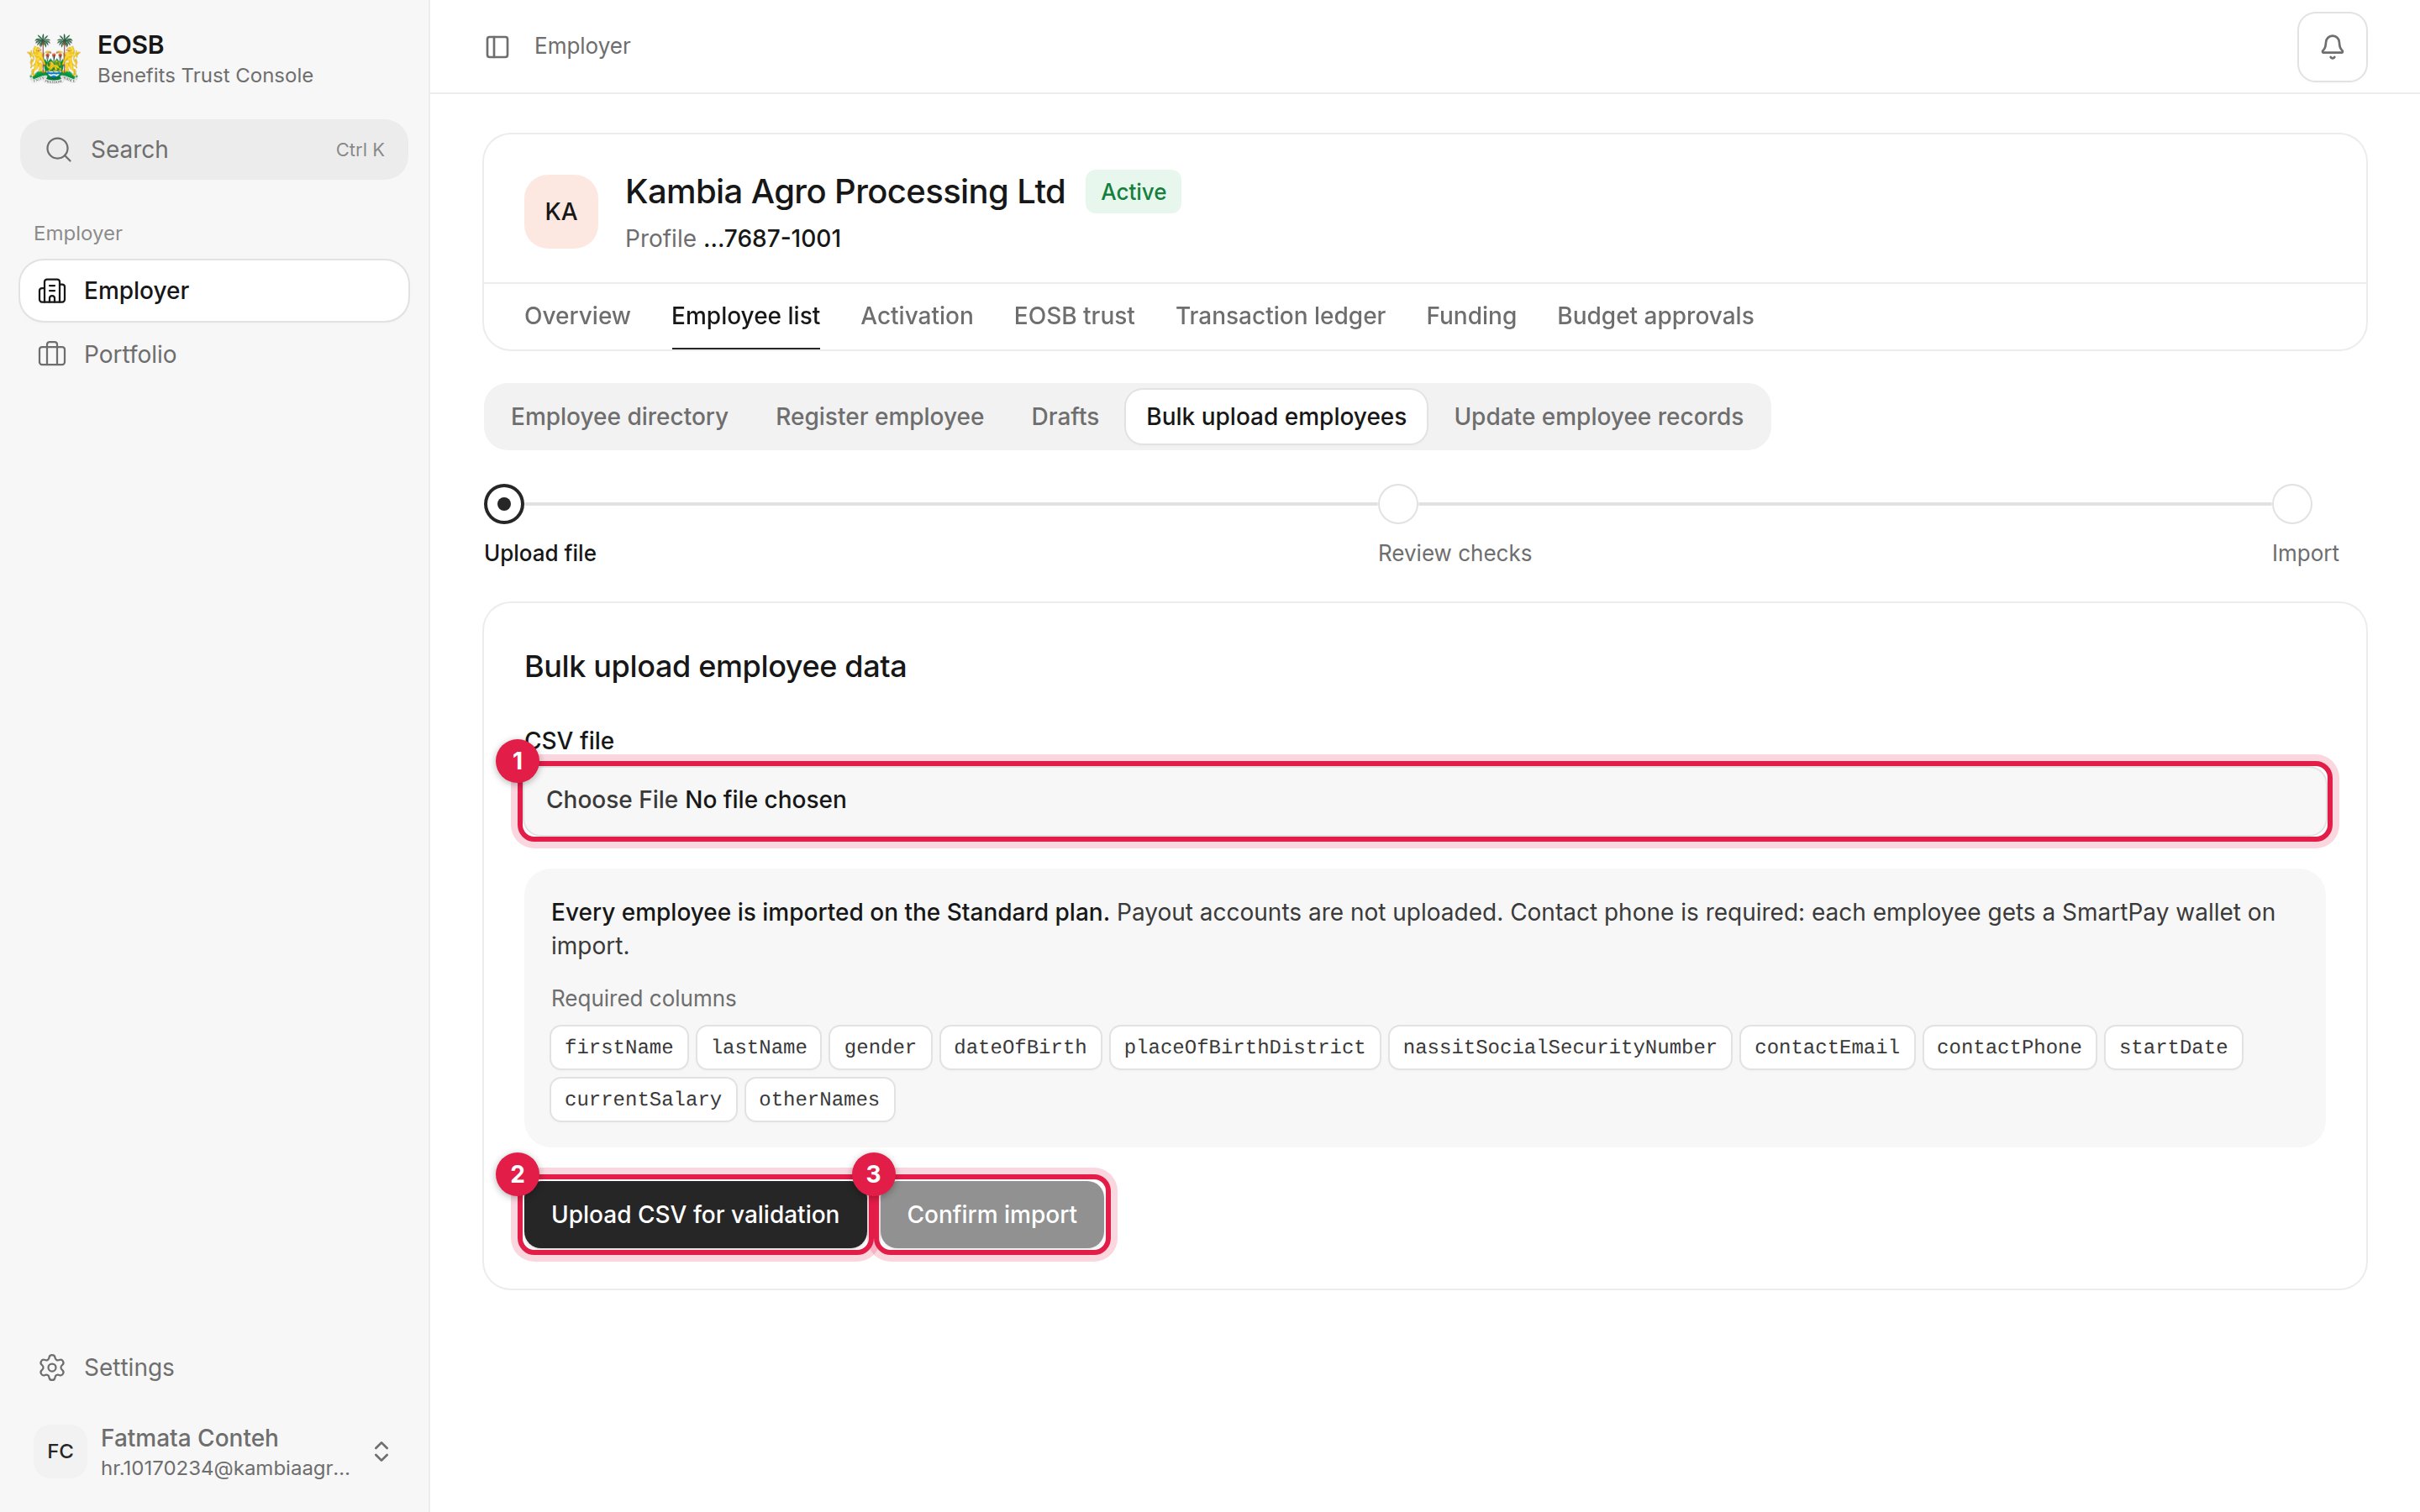
Bulk upload, stage 1: Upload file
1
Choose your CSV file (1)
2
Select Upload CSV for validation (2)
The platform checks every row and shows the result. Confirm import (3) stays disabled until there is at least one valid row.
3
Review the results
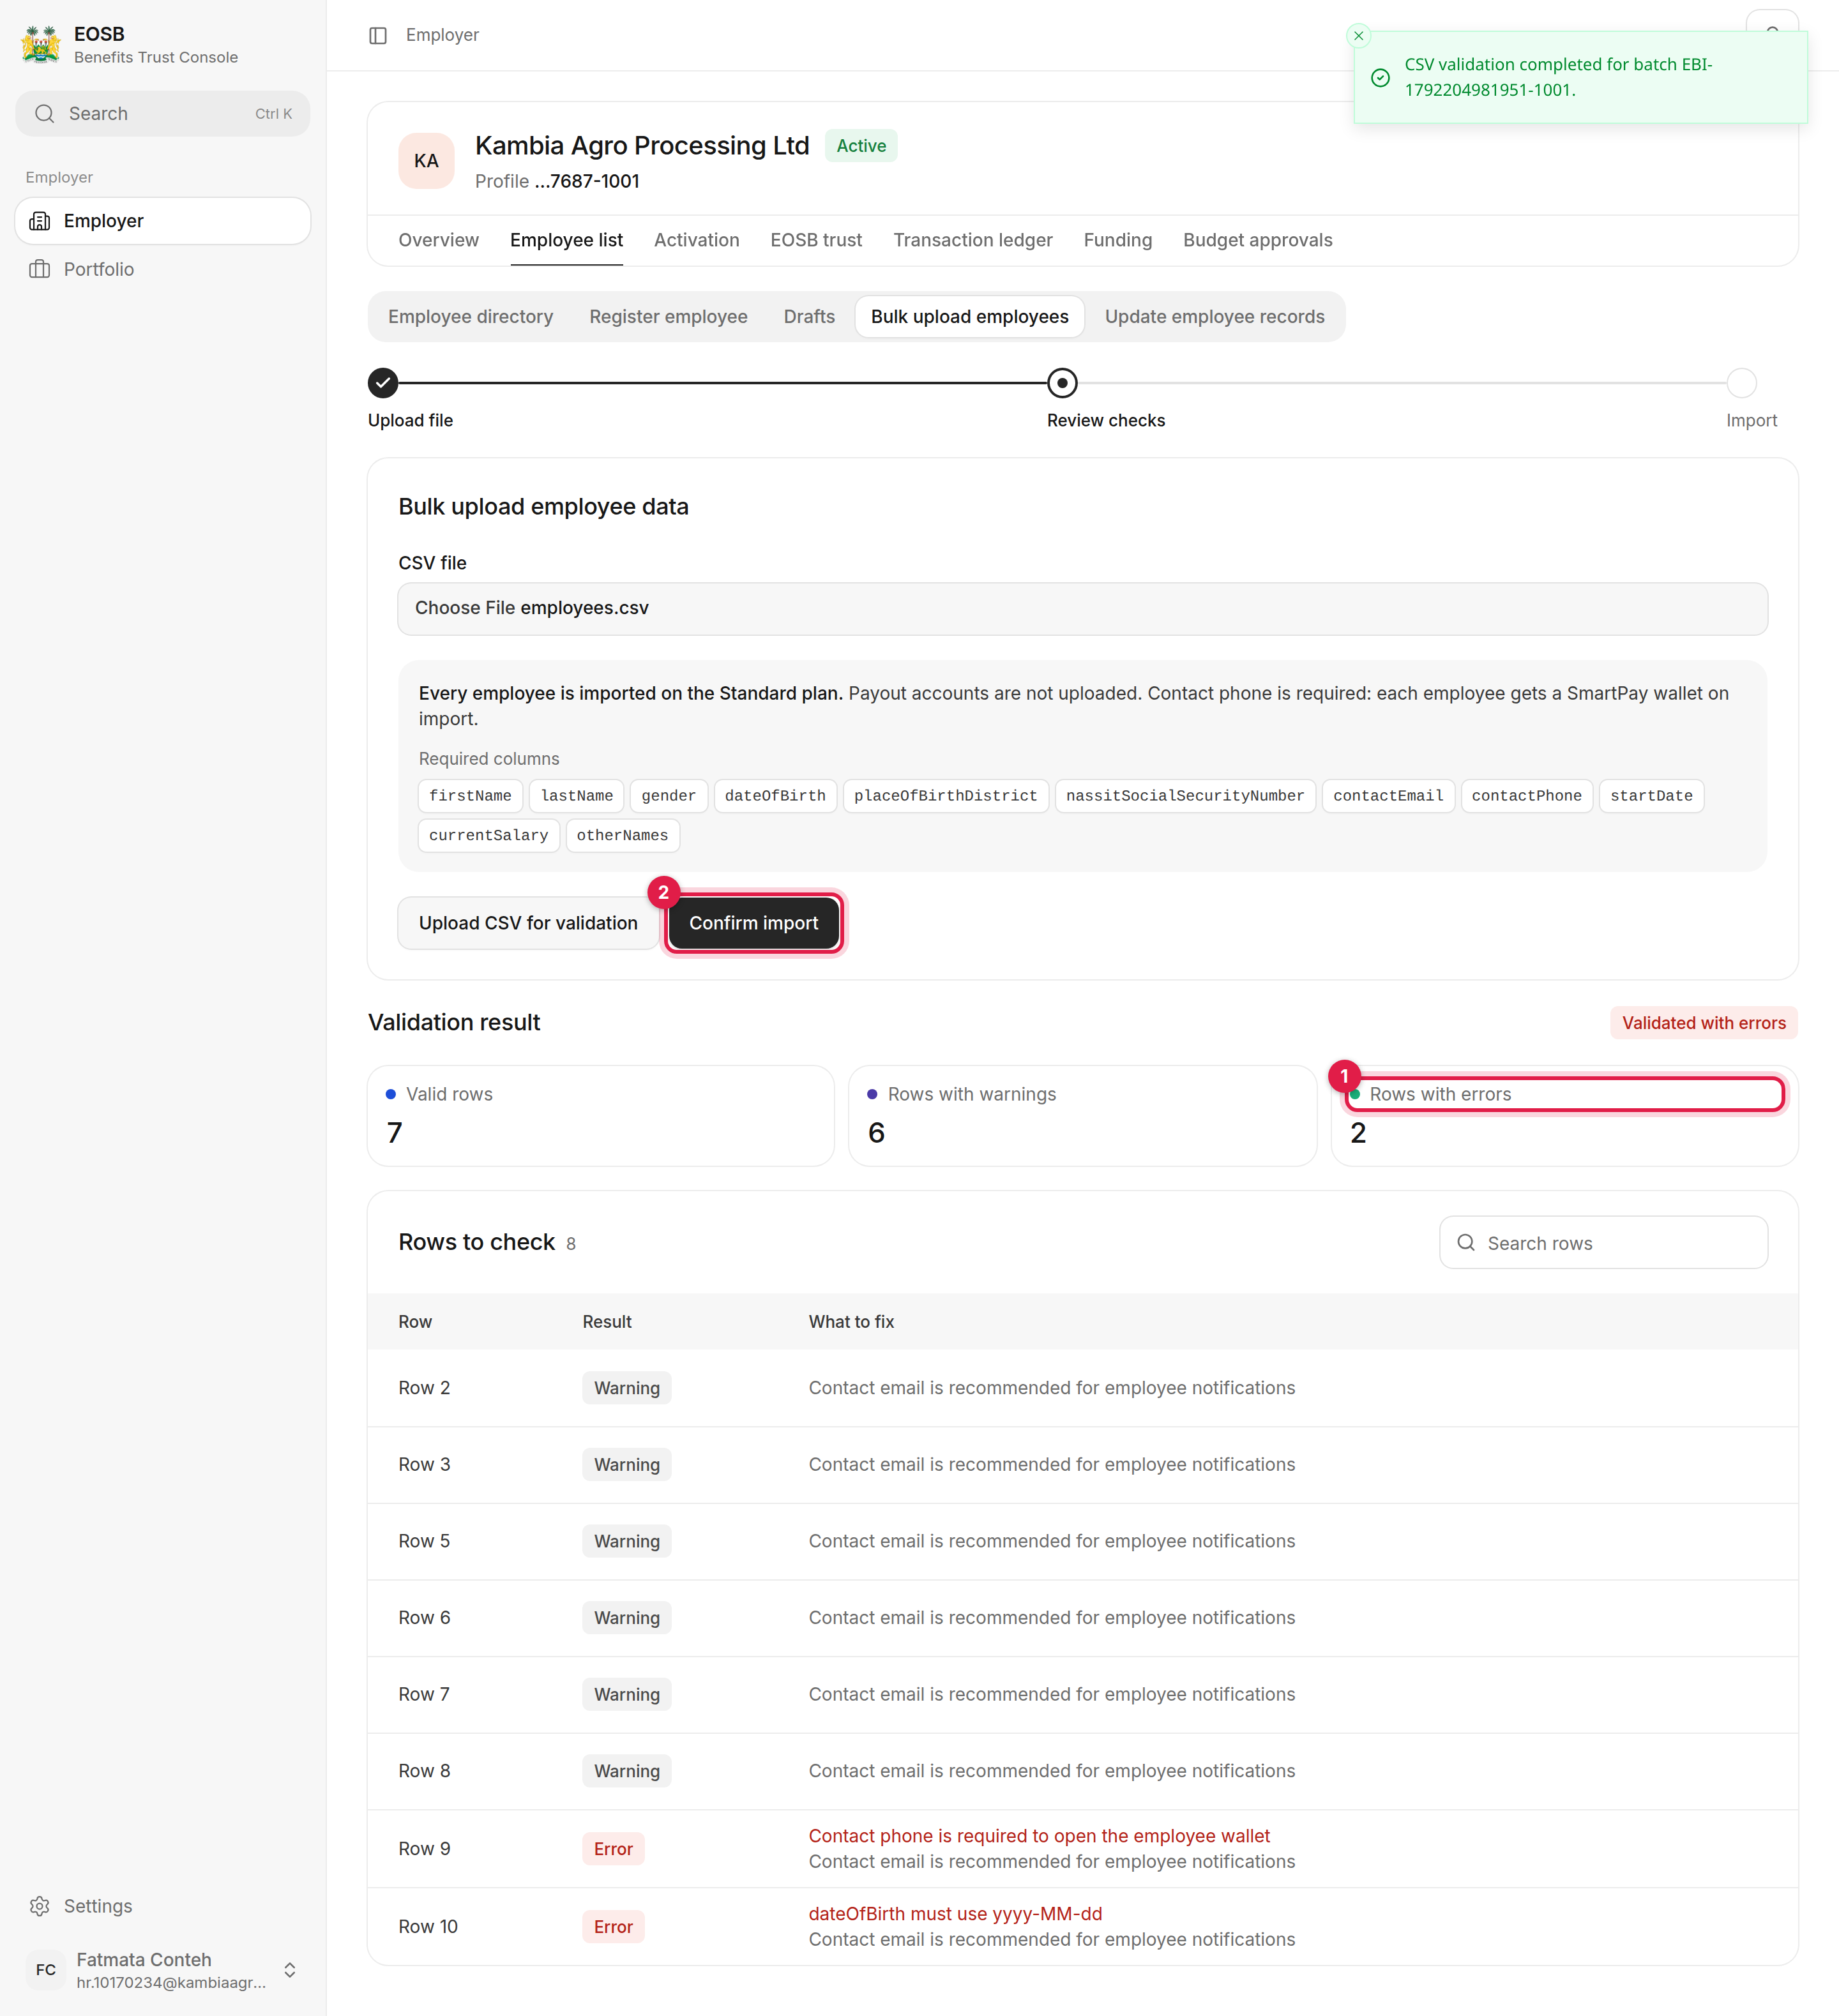
Stage 2: Review checks
- Valid rows will be imported.
- Rows with warnings will be imported, but something is worth checking — usually a missing contact email.
- Rows with errors (1) will be rejected. The What to fix column says why, for example Contact phone is required to open the employee wallet or dateOfBirth must use yyyy-MM-dd.
4
Select Confirm import (2)
Valid rows are added to your directory. Rows with errors are rejected.
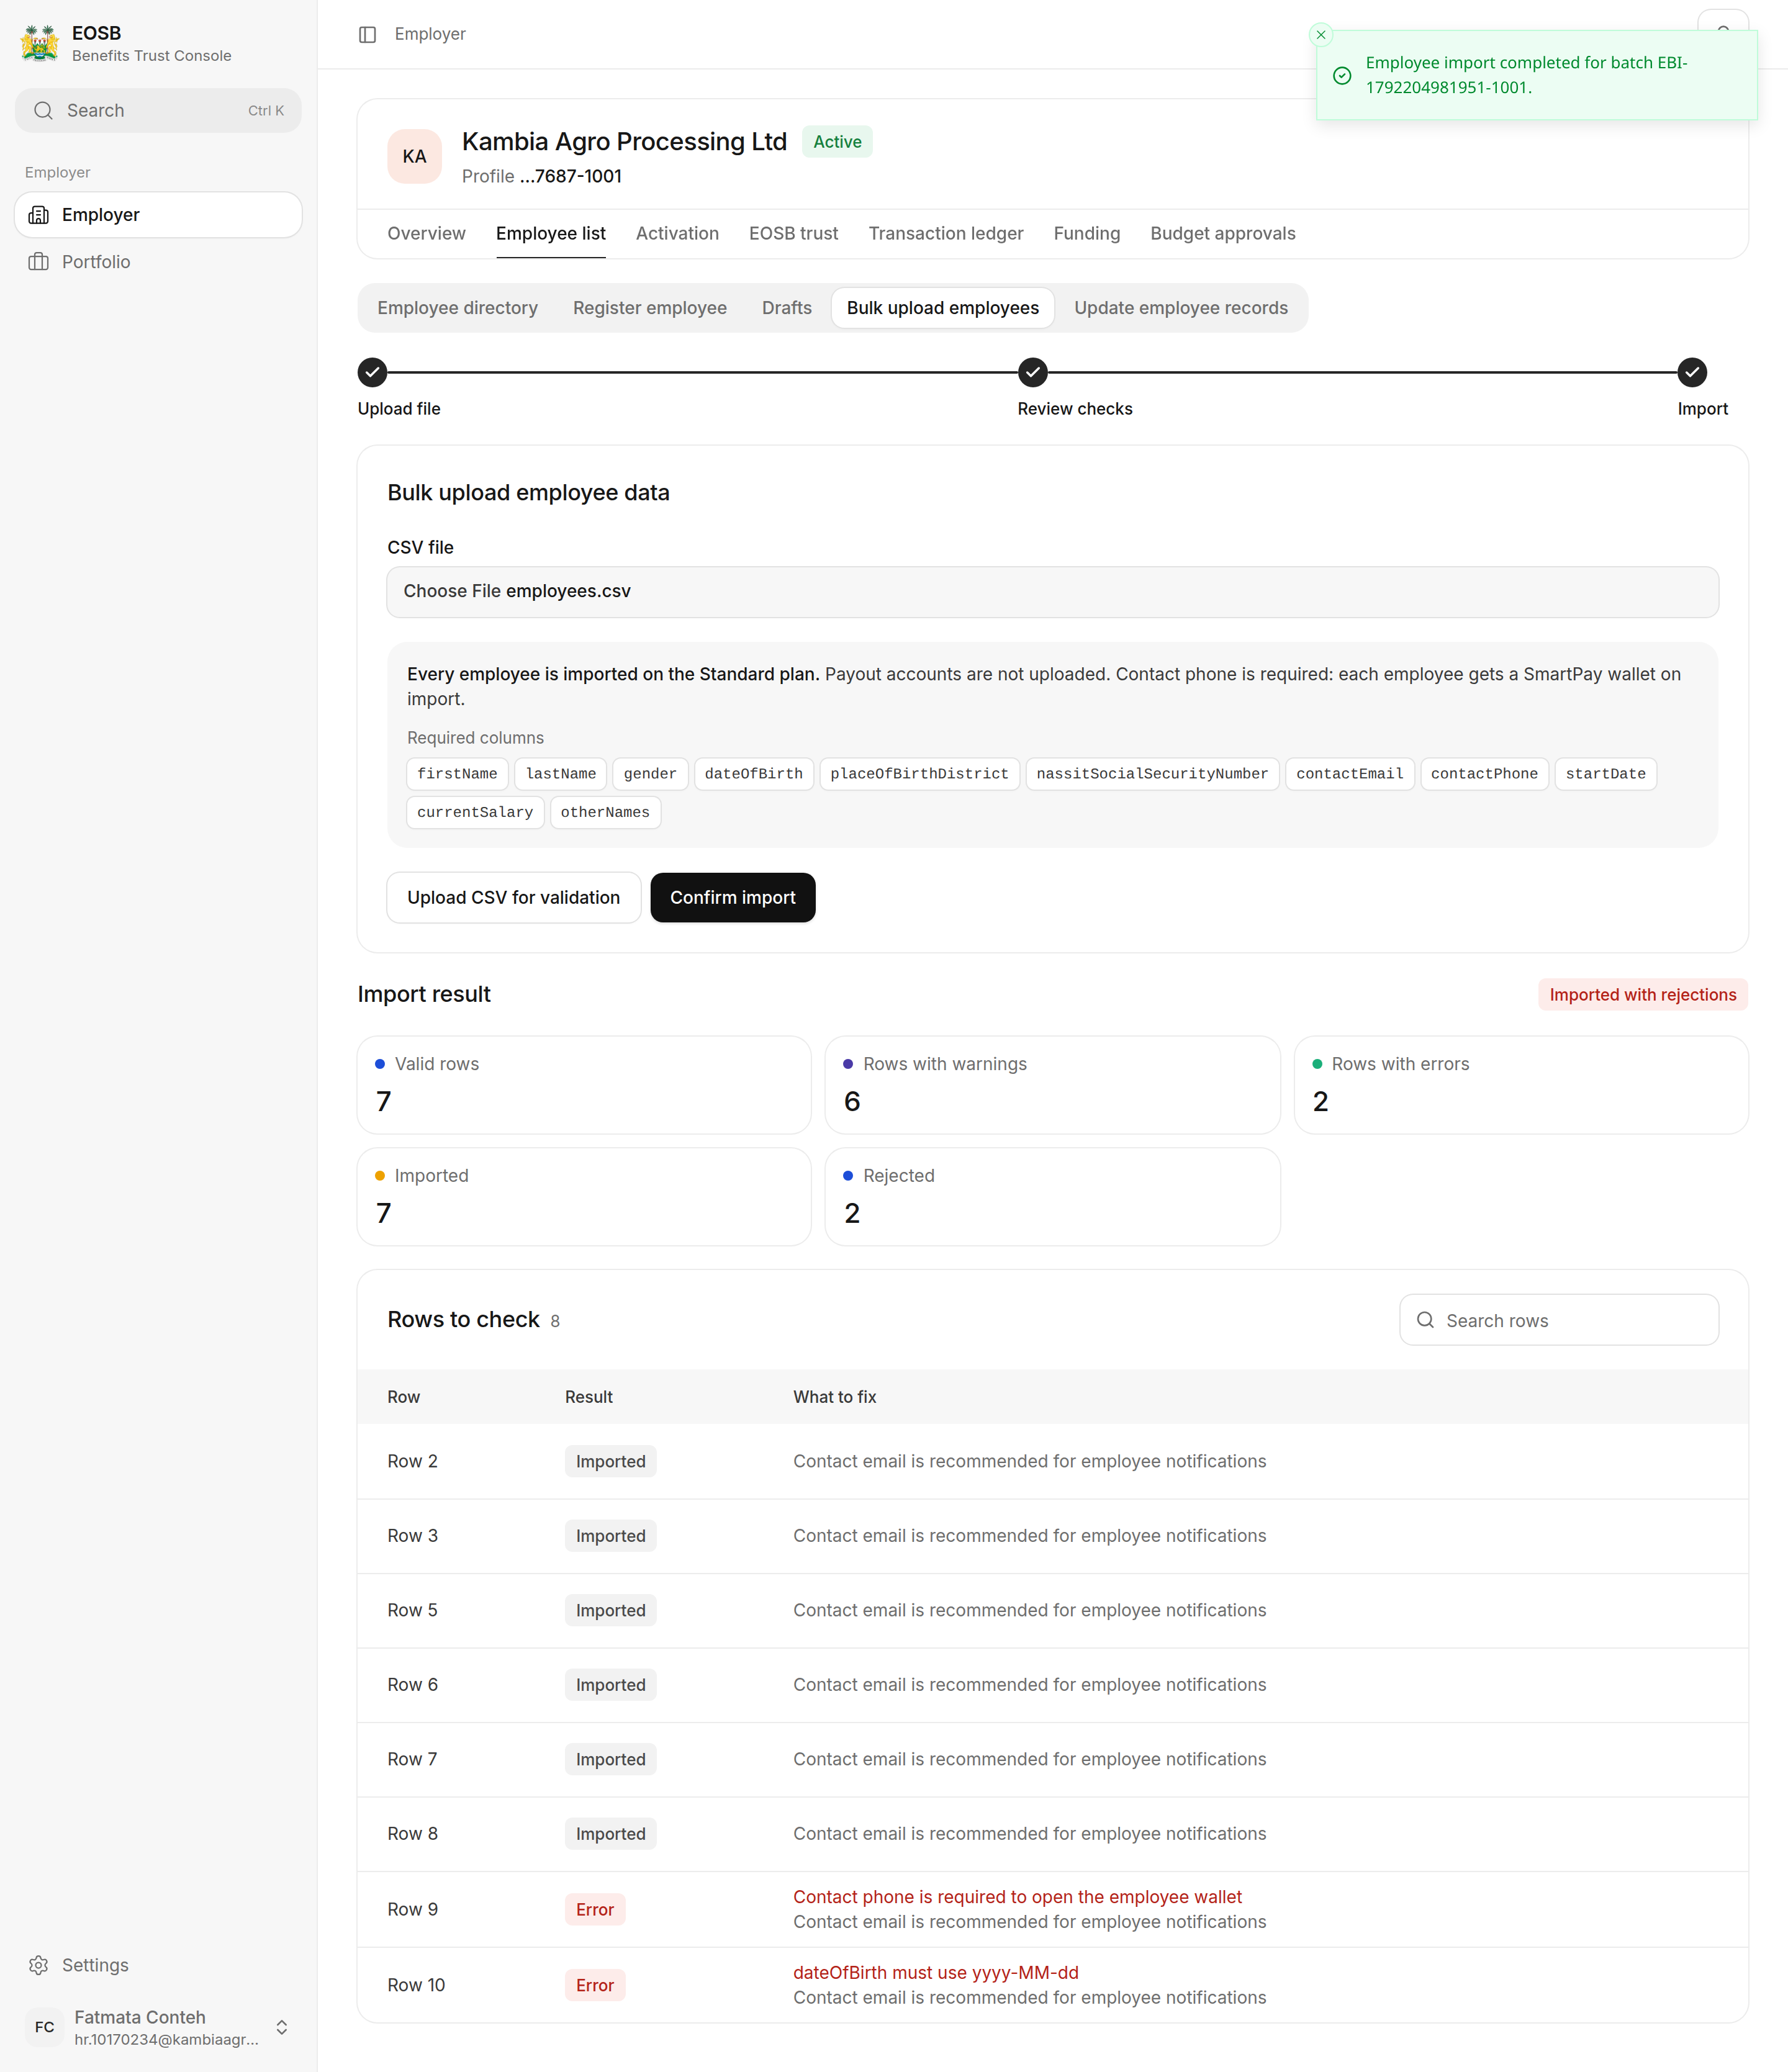
Stage 3: Import result