
Where: Transfers in the menu. Before you start: have the trust’s bank statement for the payment dates to hand.
Payments an employer makes from a linked SmartPay wallet settle on their own and do not come to you.
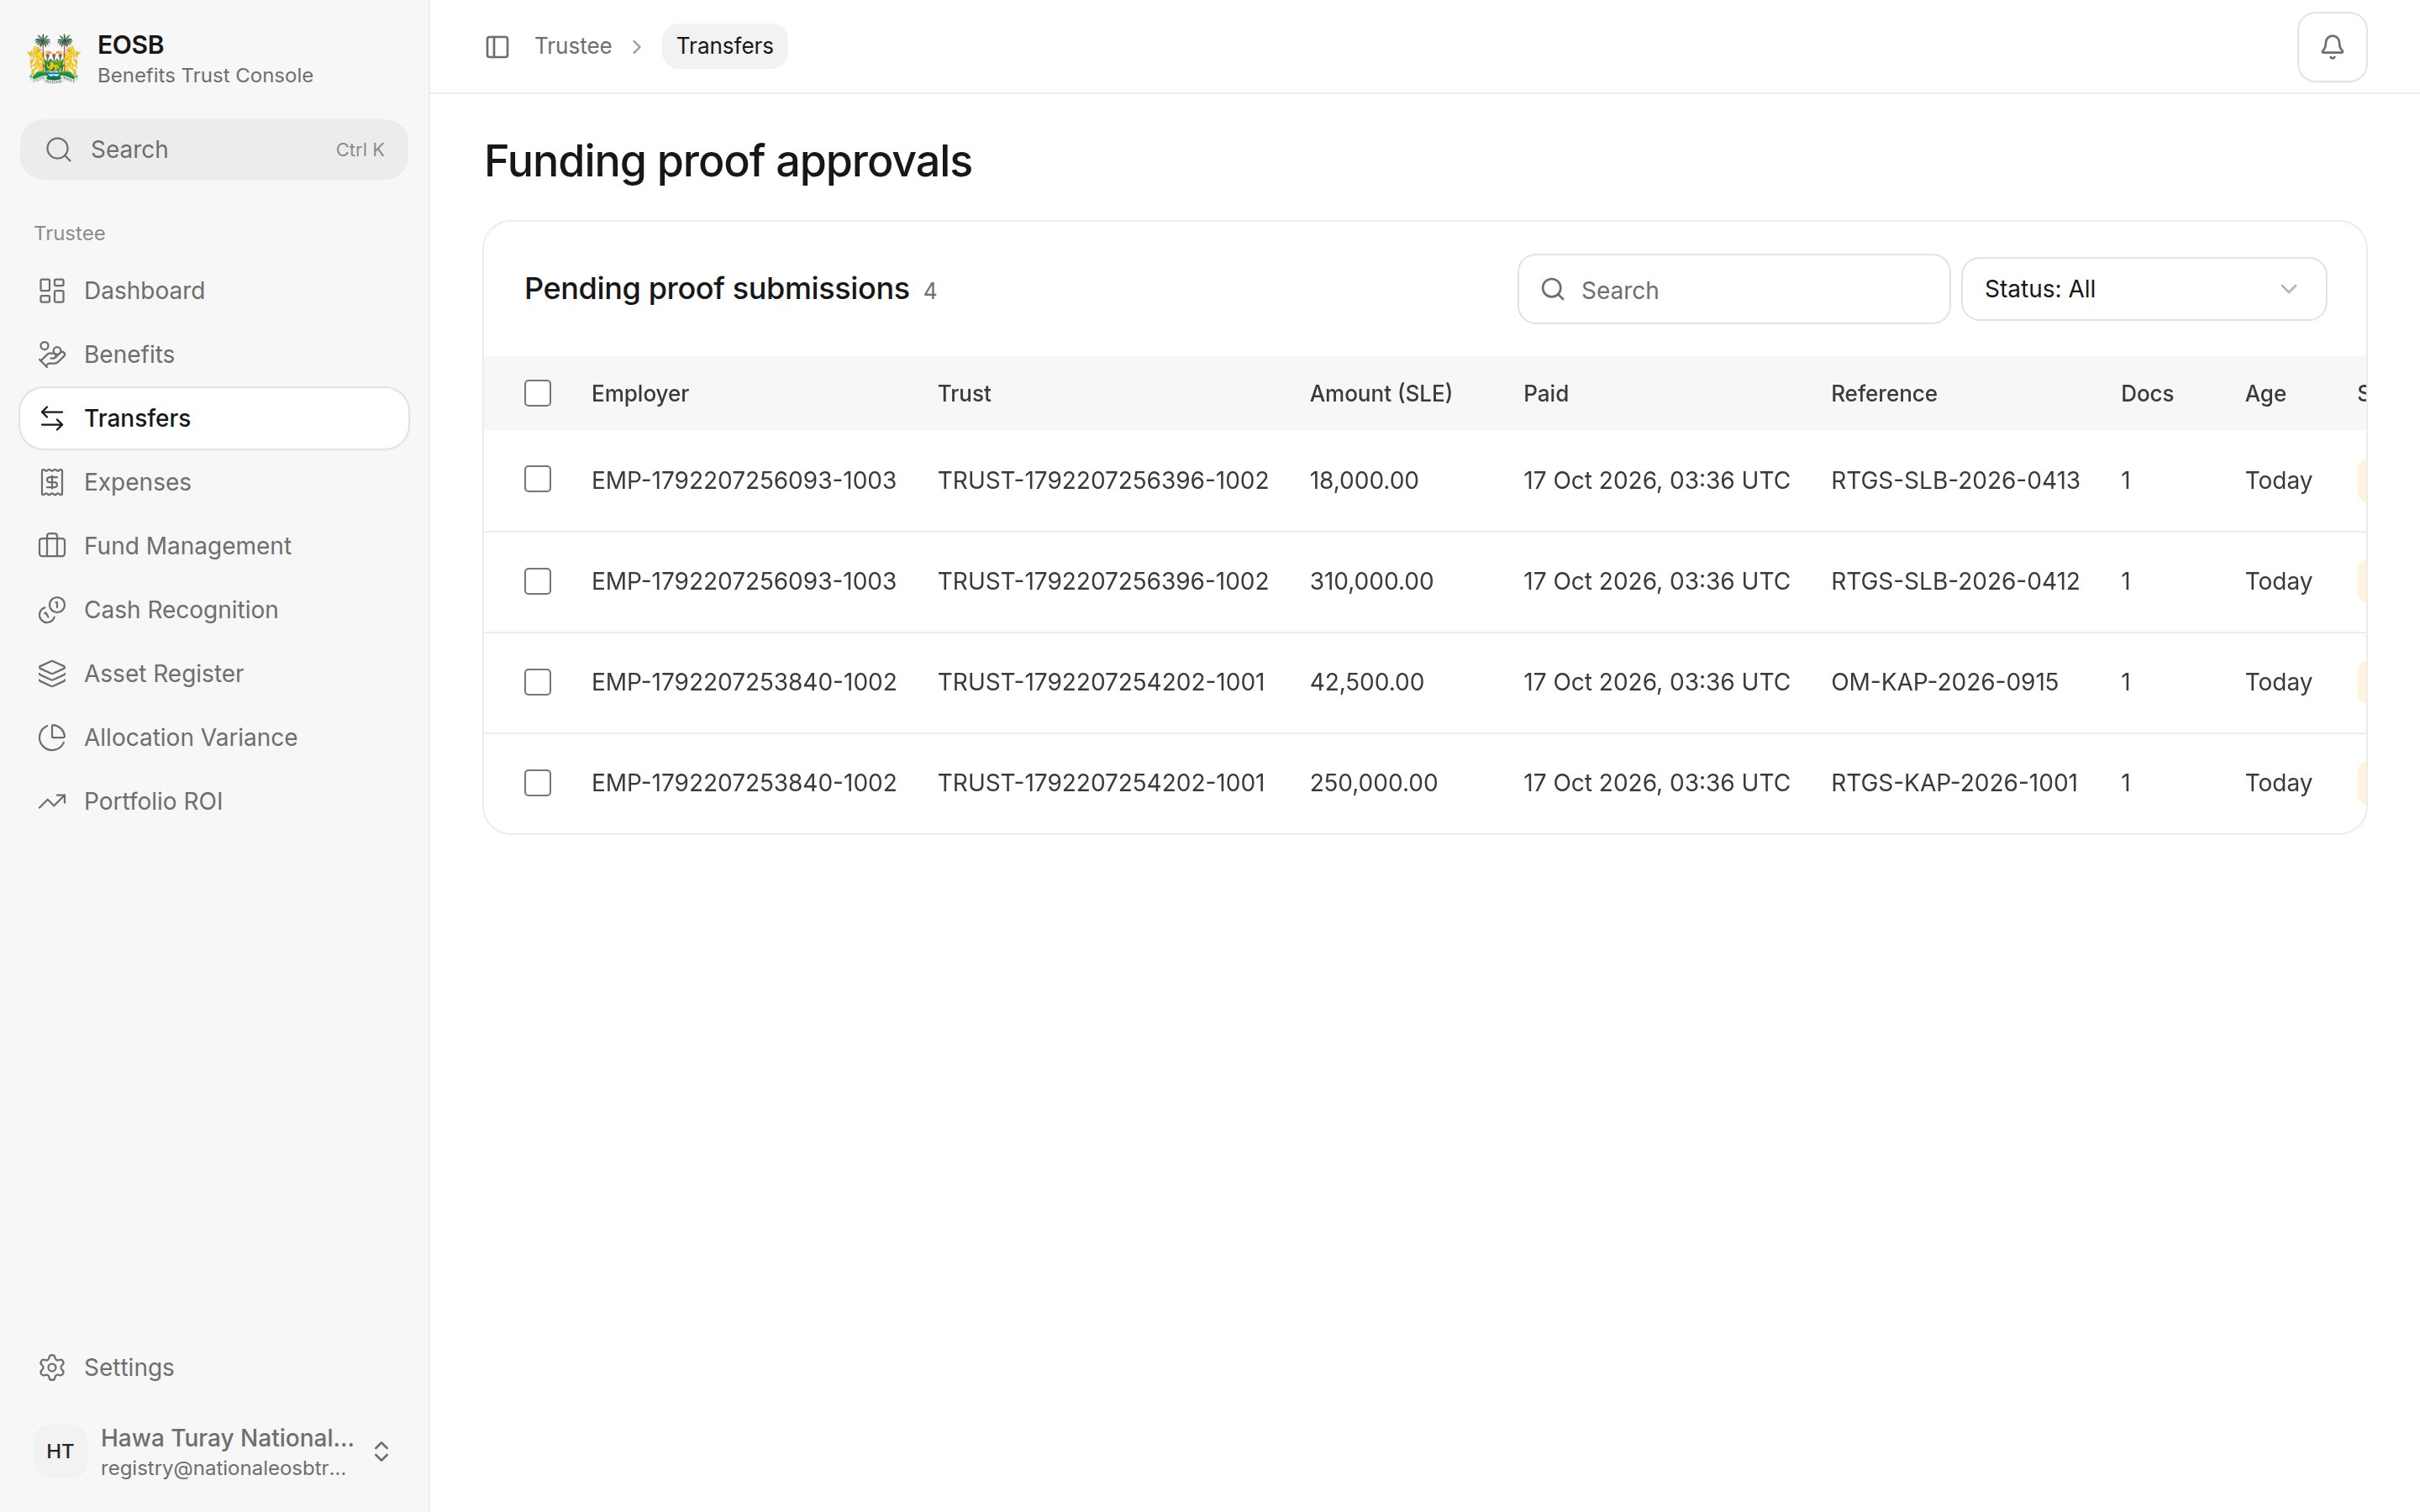
Funding proofs waiting
Review one proof
Select Review. The proof opens on the right.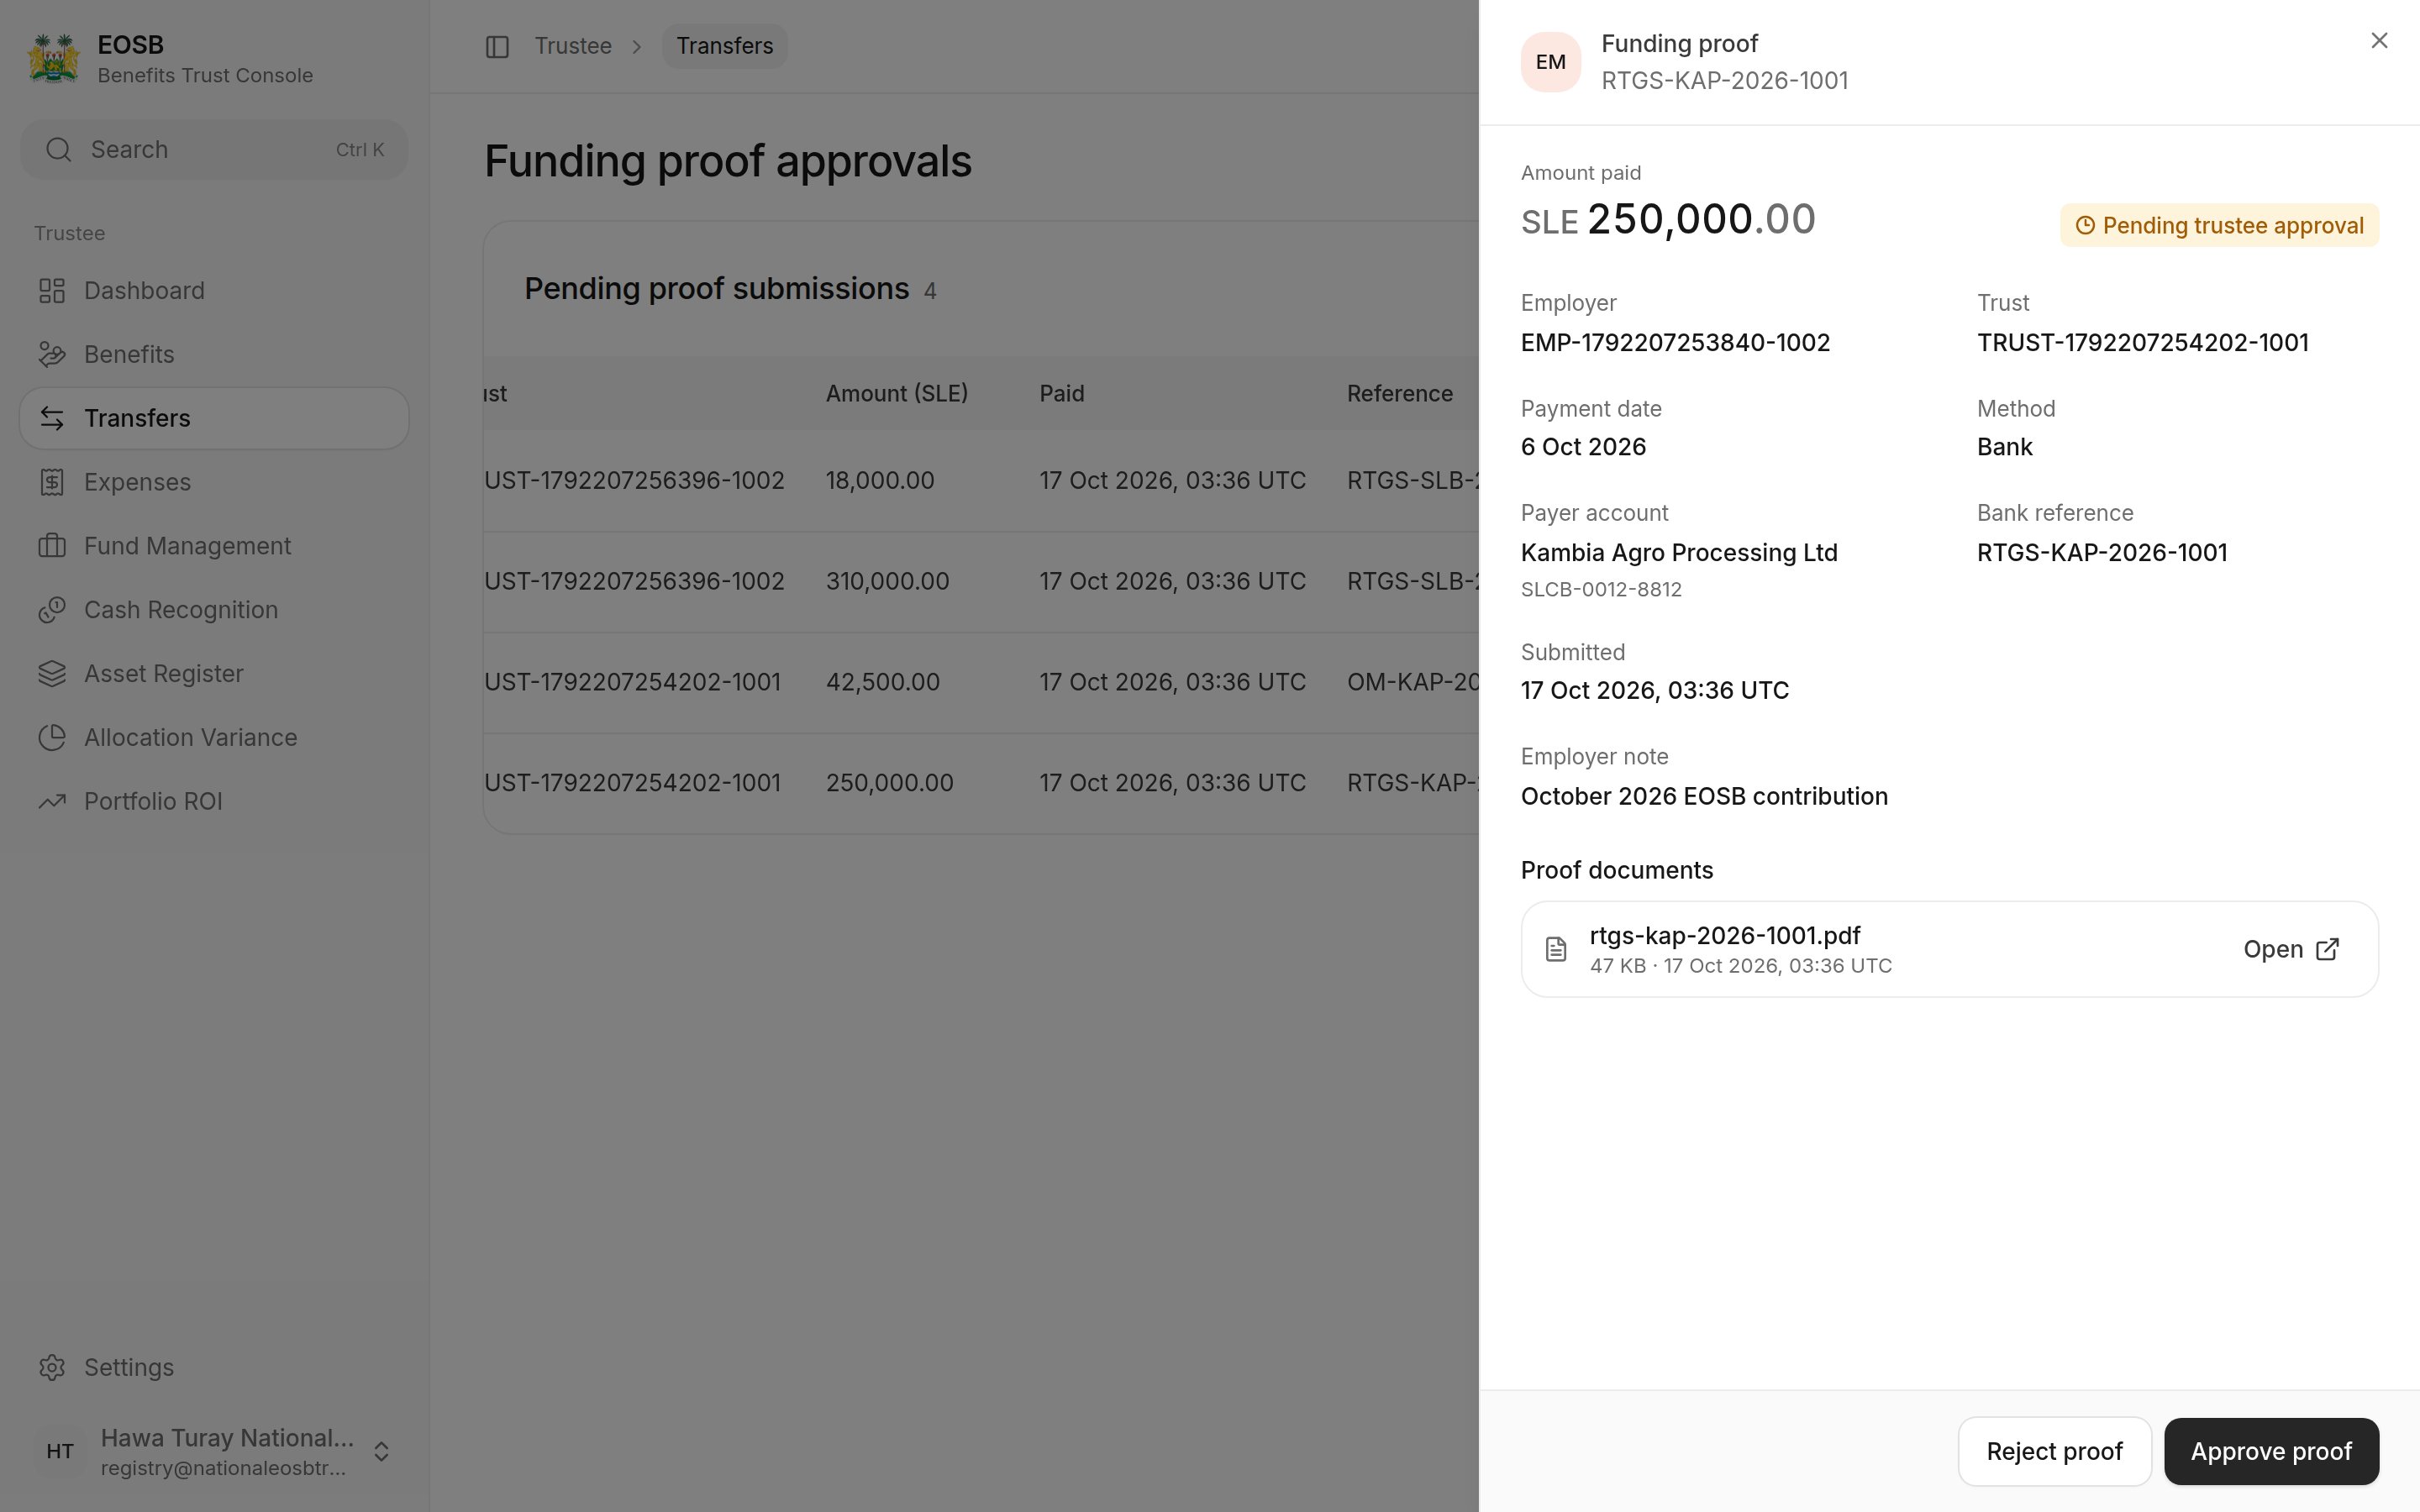
A funding proof
1
Check it against the trust bank statement
Match the amount, payment date and bank reference, and open the proof document.
2
Approve or reject
- Approve proof — add an optional note, then select Approve proof again.
- Reject proof — write a Rejection reason (required); the employer sees it. Then select Reject proof again.
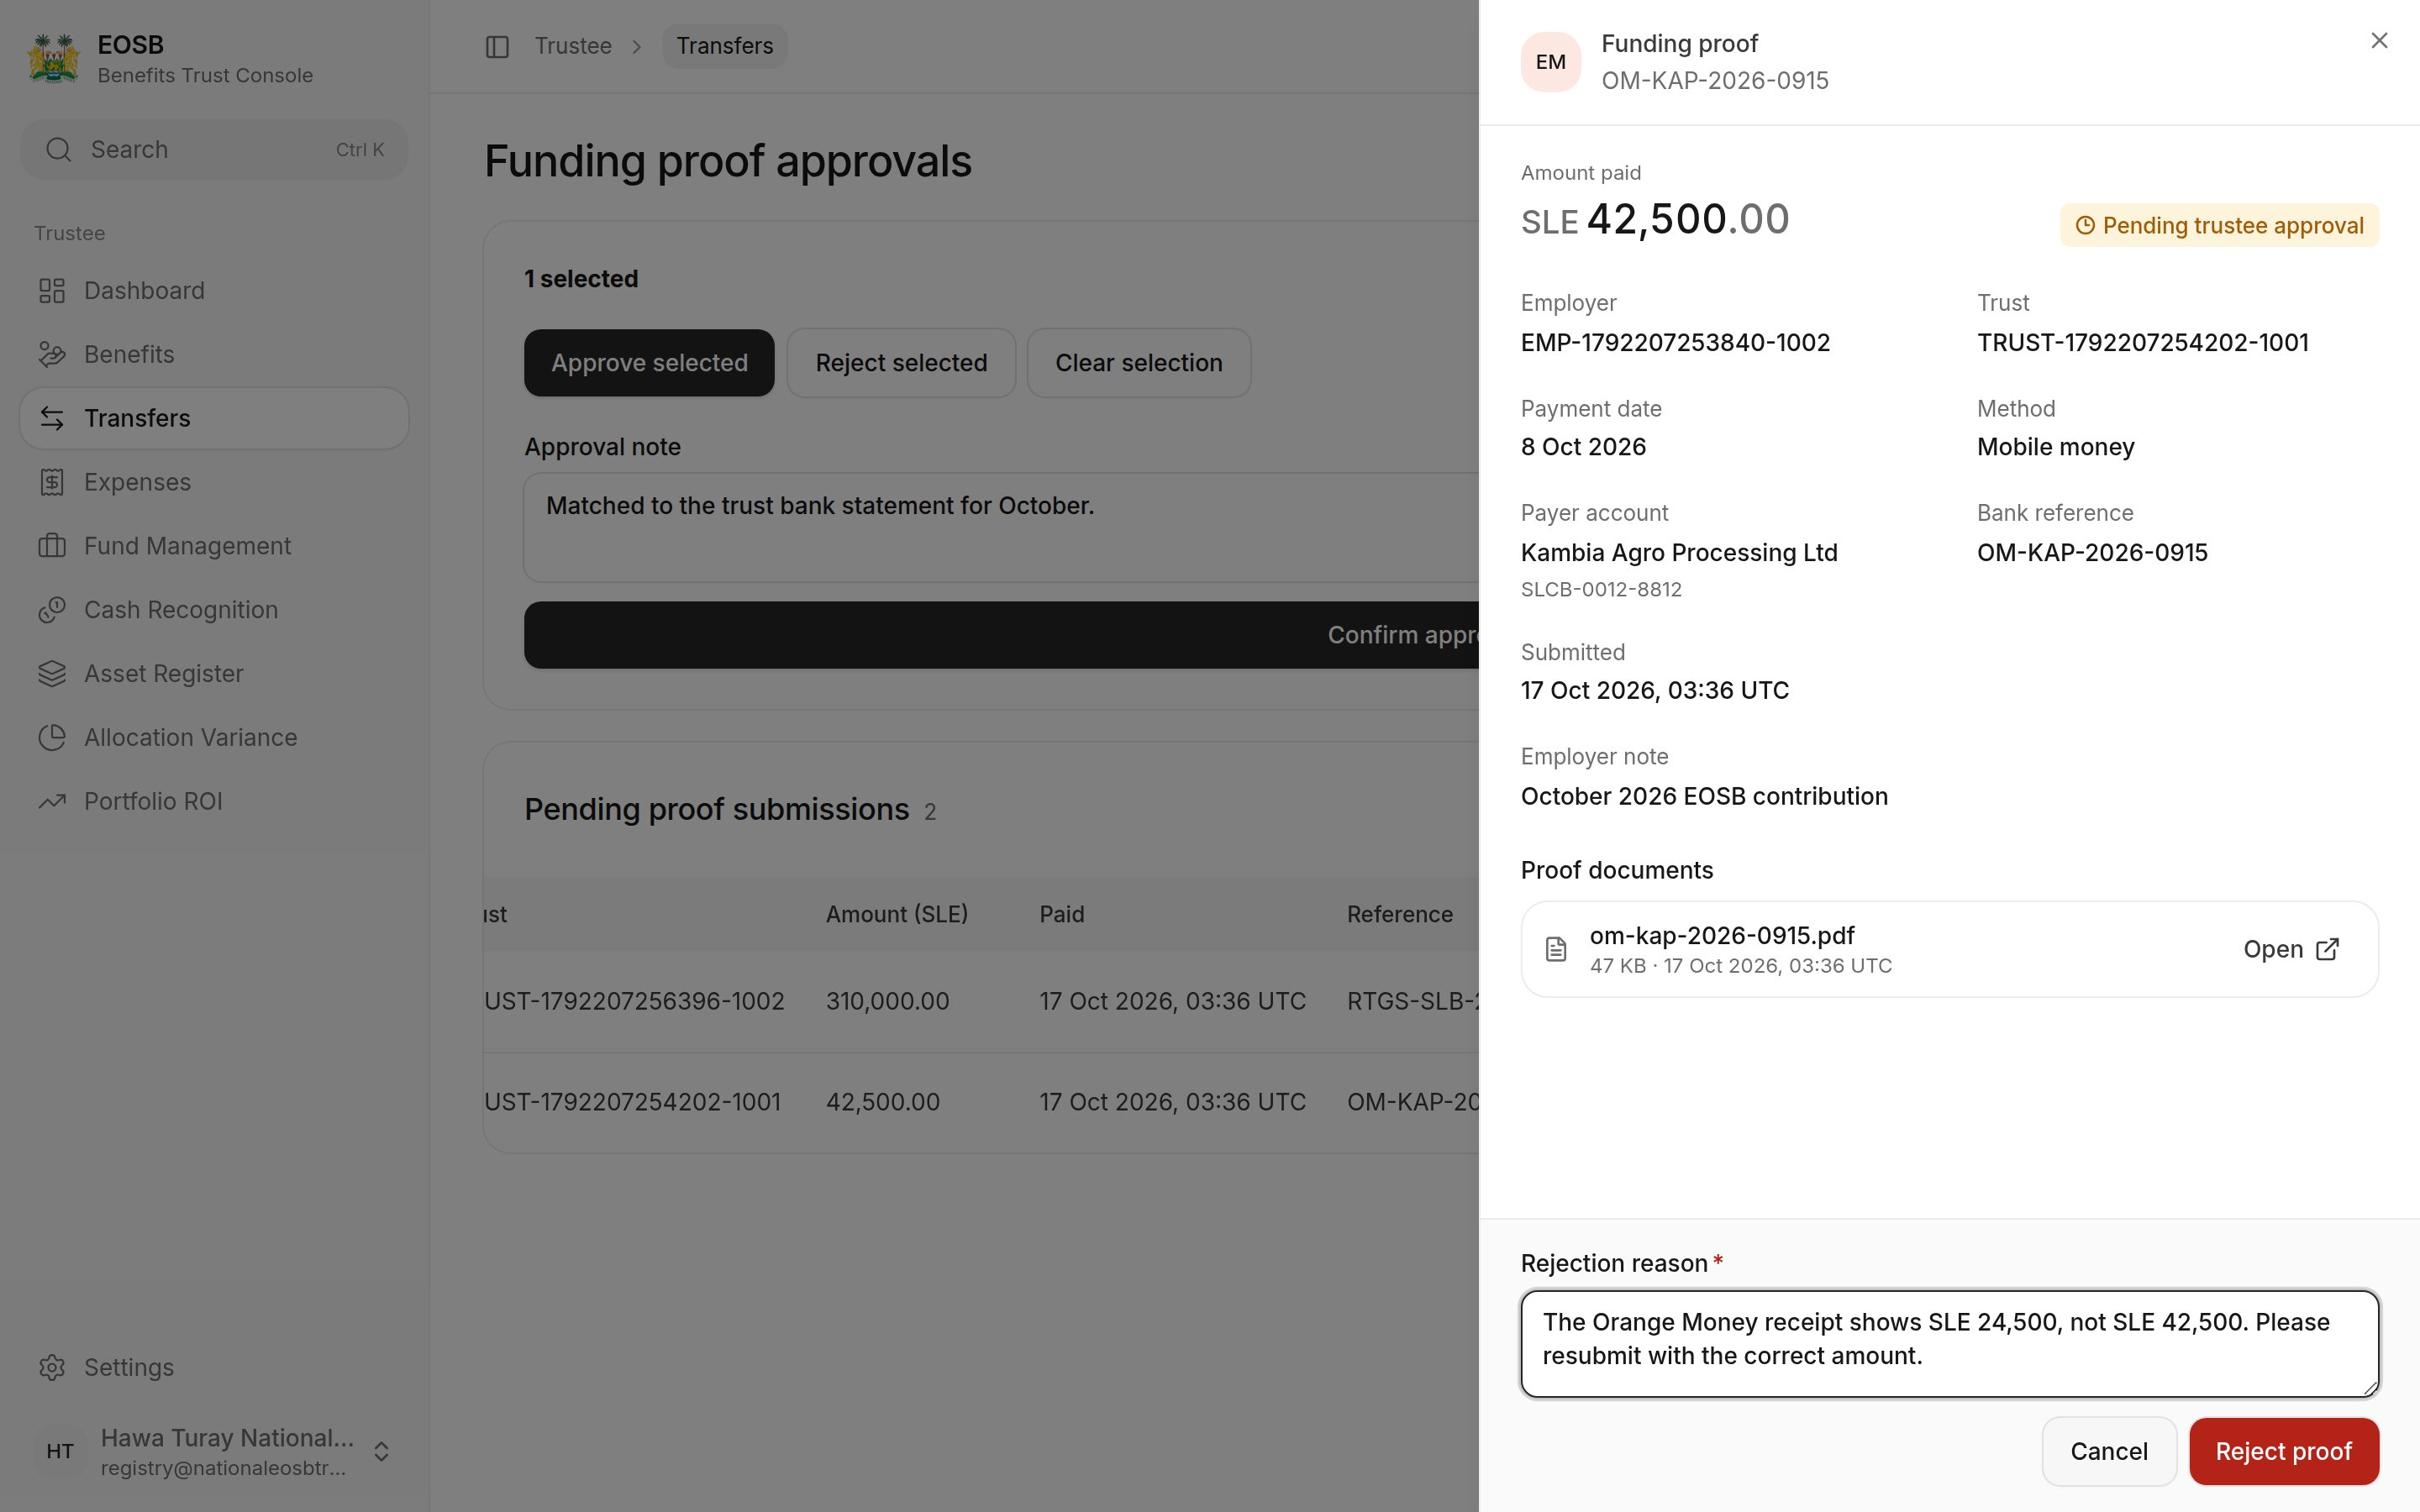
Rejecting a proof
What happens next
- Approved — the payment shows on the employer’s side as Received, is posted to the employer’s ledger as a funding receipt, and becomes employer-funded cash you can send to the fund manager.
- Rejected — the employer sees Trustee rejected with your reason, and submits a corrected proof if needed. Nothing is added to the trust.
Good to know: writing a useful rejection reason
Good to know: writing a useful rejection reason
Say what did not match and what you expect instead, for example “The receipt shows SLE 24,500, not SLE 42,500. Please resubmit with the correct amount.” The employer reads exactly what you write.
Approve or reject several at once
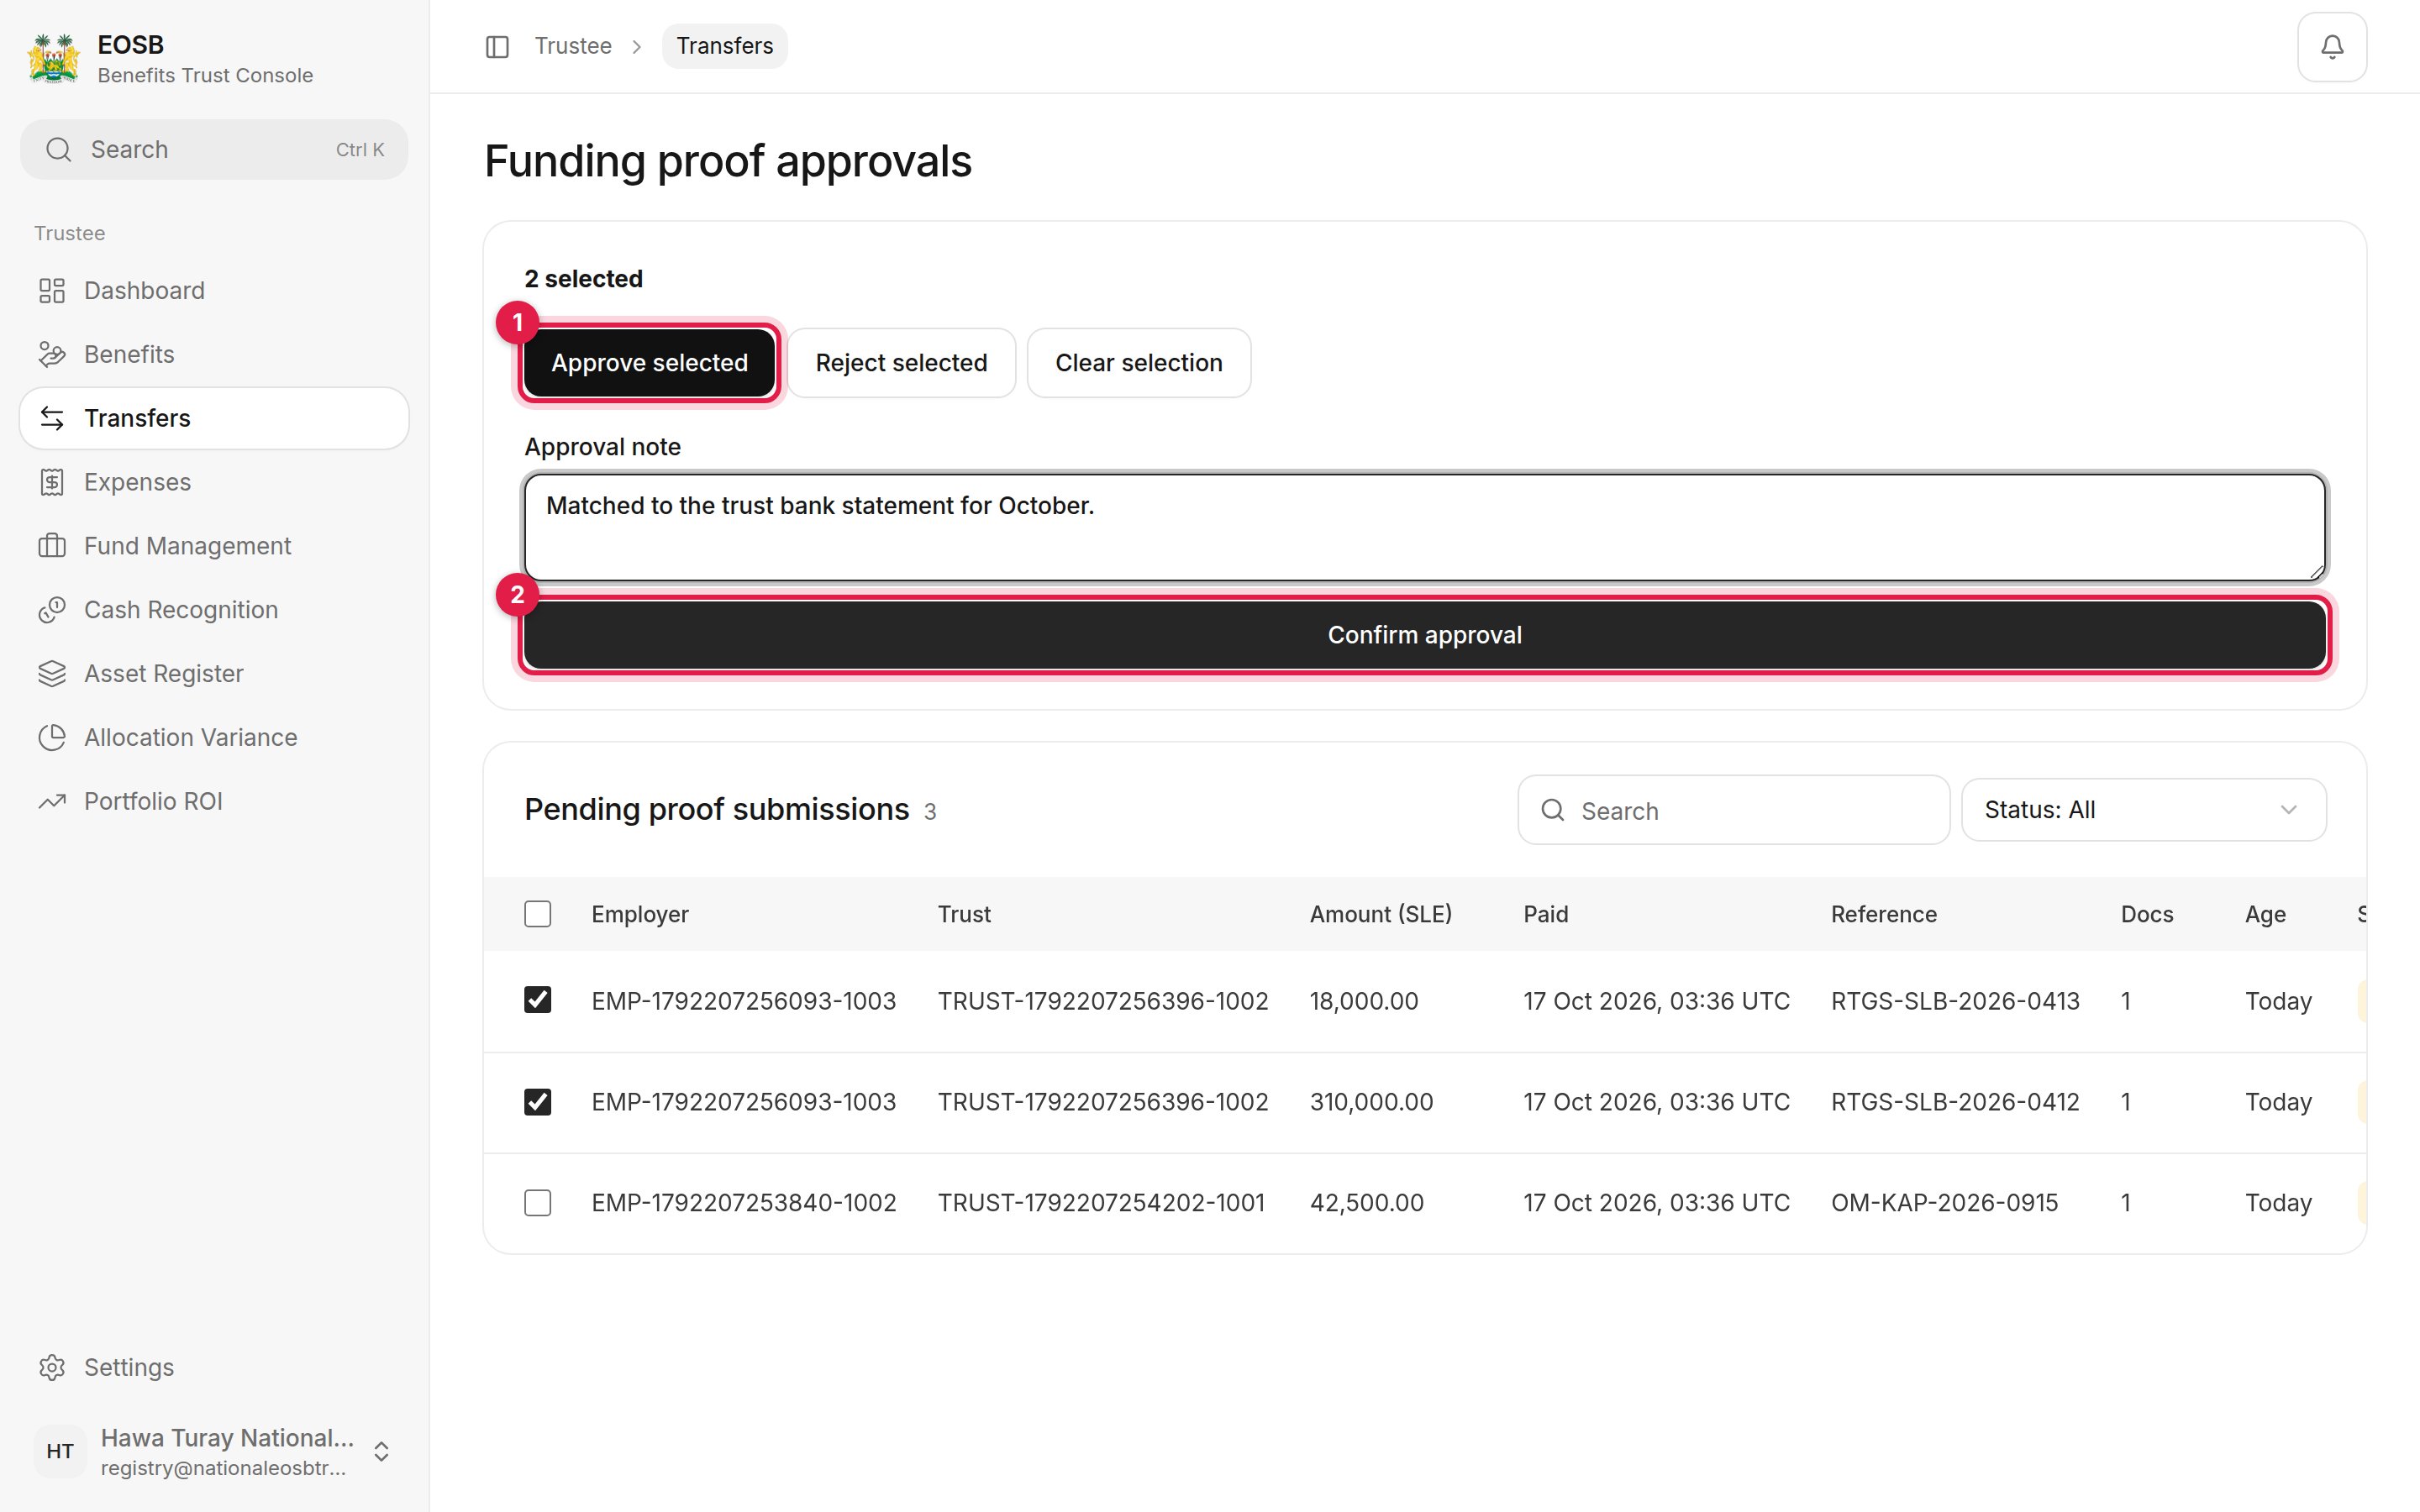
Two proofs selected
1
Tick the proofs
Use the box at the start of each row, or the heading box for all of them.
2
Select Approve selected (1) or Reject selected
Add an approval note, or a rejection reason (required).
3
Select Confirm approval (2) or Confirm rejection
All proofs decided