> ## Documentation Index
> Fetch the complete documentation index at: https://docs.eosb.org/llms.txt
> Use this file to discover all available pages before exploring further.
# Bulk upload employees
> Add many employees from a CSV file. Every row is checked before anything is imported.
Use bulk upload for your first load of staff, or whenever you take on many people at once. It has three stages: **Upload file**, **Review checks** and **Import**. Nothing is added to your directory until you confirm the import, so you can upload as many times as you like while fixing the file.
**Where:** Employer › **Employee list** › **Bulk upload employees**. **Before you start:** your account must be [Active](/employer/activation).
## Prepare the file
Save your list as a **CSV** file with these columns in the first row, spelled exactly as shown:
```csv theme={null}
firstName,lastName,gender,dateOfBirth,placeOfBirthDistrict,nassitSocialSecurityNumber,contactEmail,contactPhone,startDate,currentSalary,otherNames
Lansana,Kargbo,Male,1992-03-14,Kono,KAP-NASSIT-100101,,23276110101,2019-01-15,6500,
Adama,Sheriff,Female,1988-11-02,Bo,KAP-NASSIT-100102,,23276110102,2016-06-01,7200,
```
A CSV file with the column headings and two example rows.
* Write dates as **YYYY-MM-DD**, for example `1992-03-14`.
* **contactPhone** is required: every employee gets a SmartPay wallet on import.
* **contactEmail** is optional, but rows without one get a warning.
* Everyone is imported on the **Standard** EOSB treatment. Payout accounts are not uploaded; add them later in [Update employee records](/employer/employees/update-records).
## Upload and check
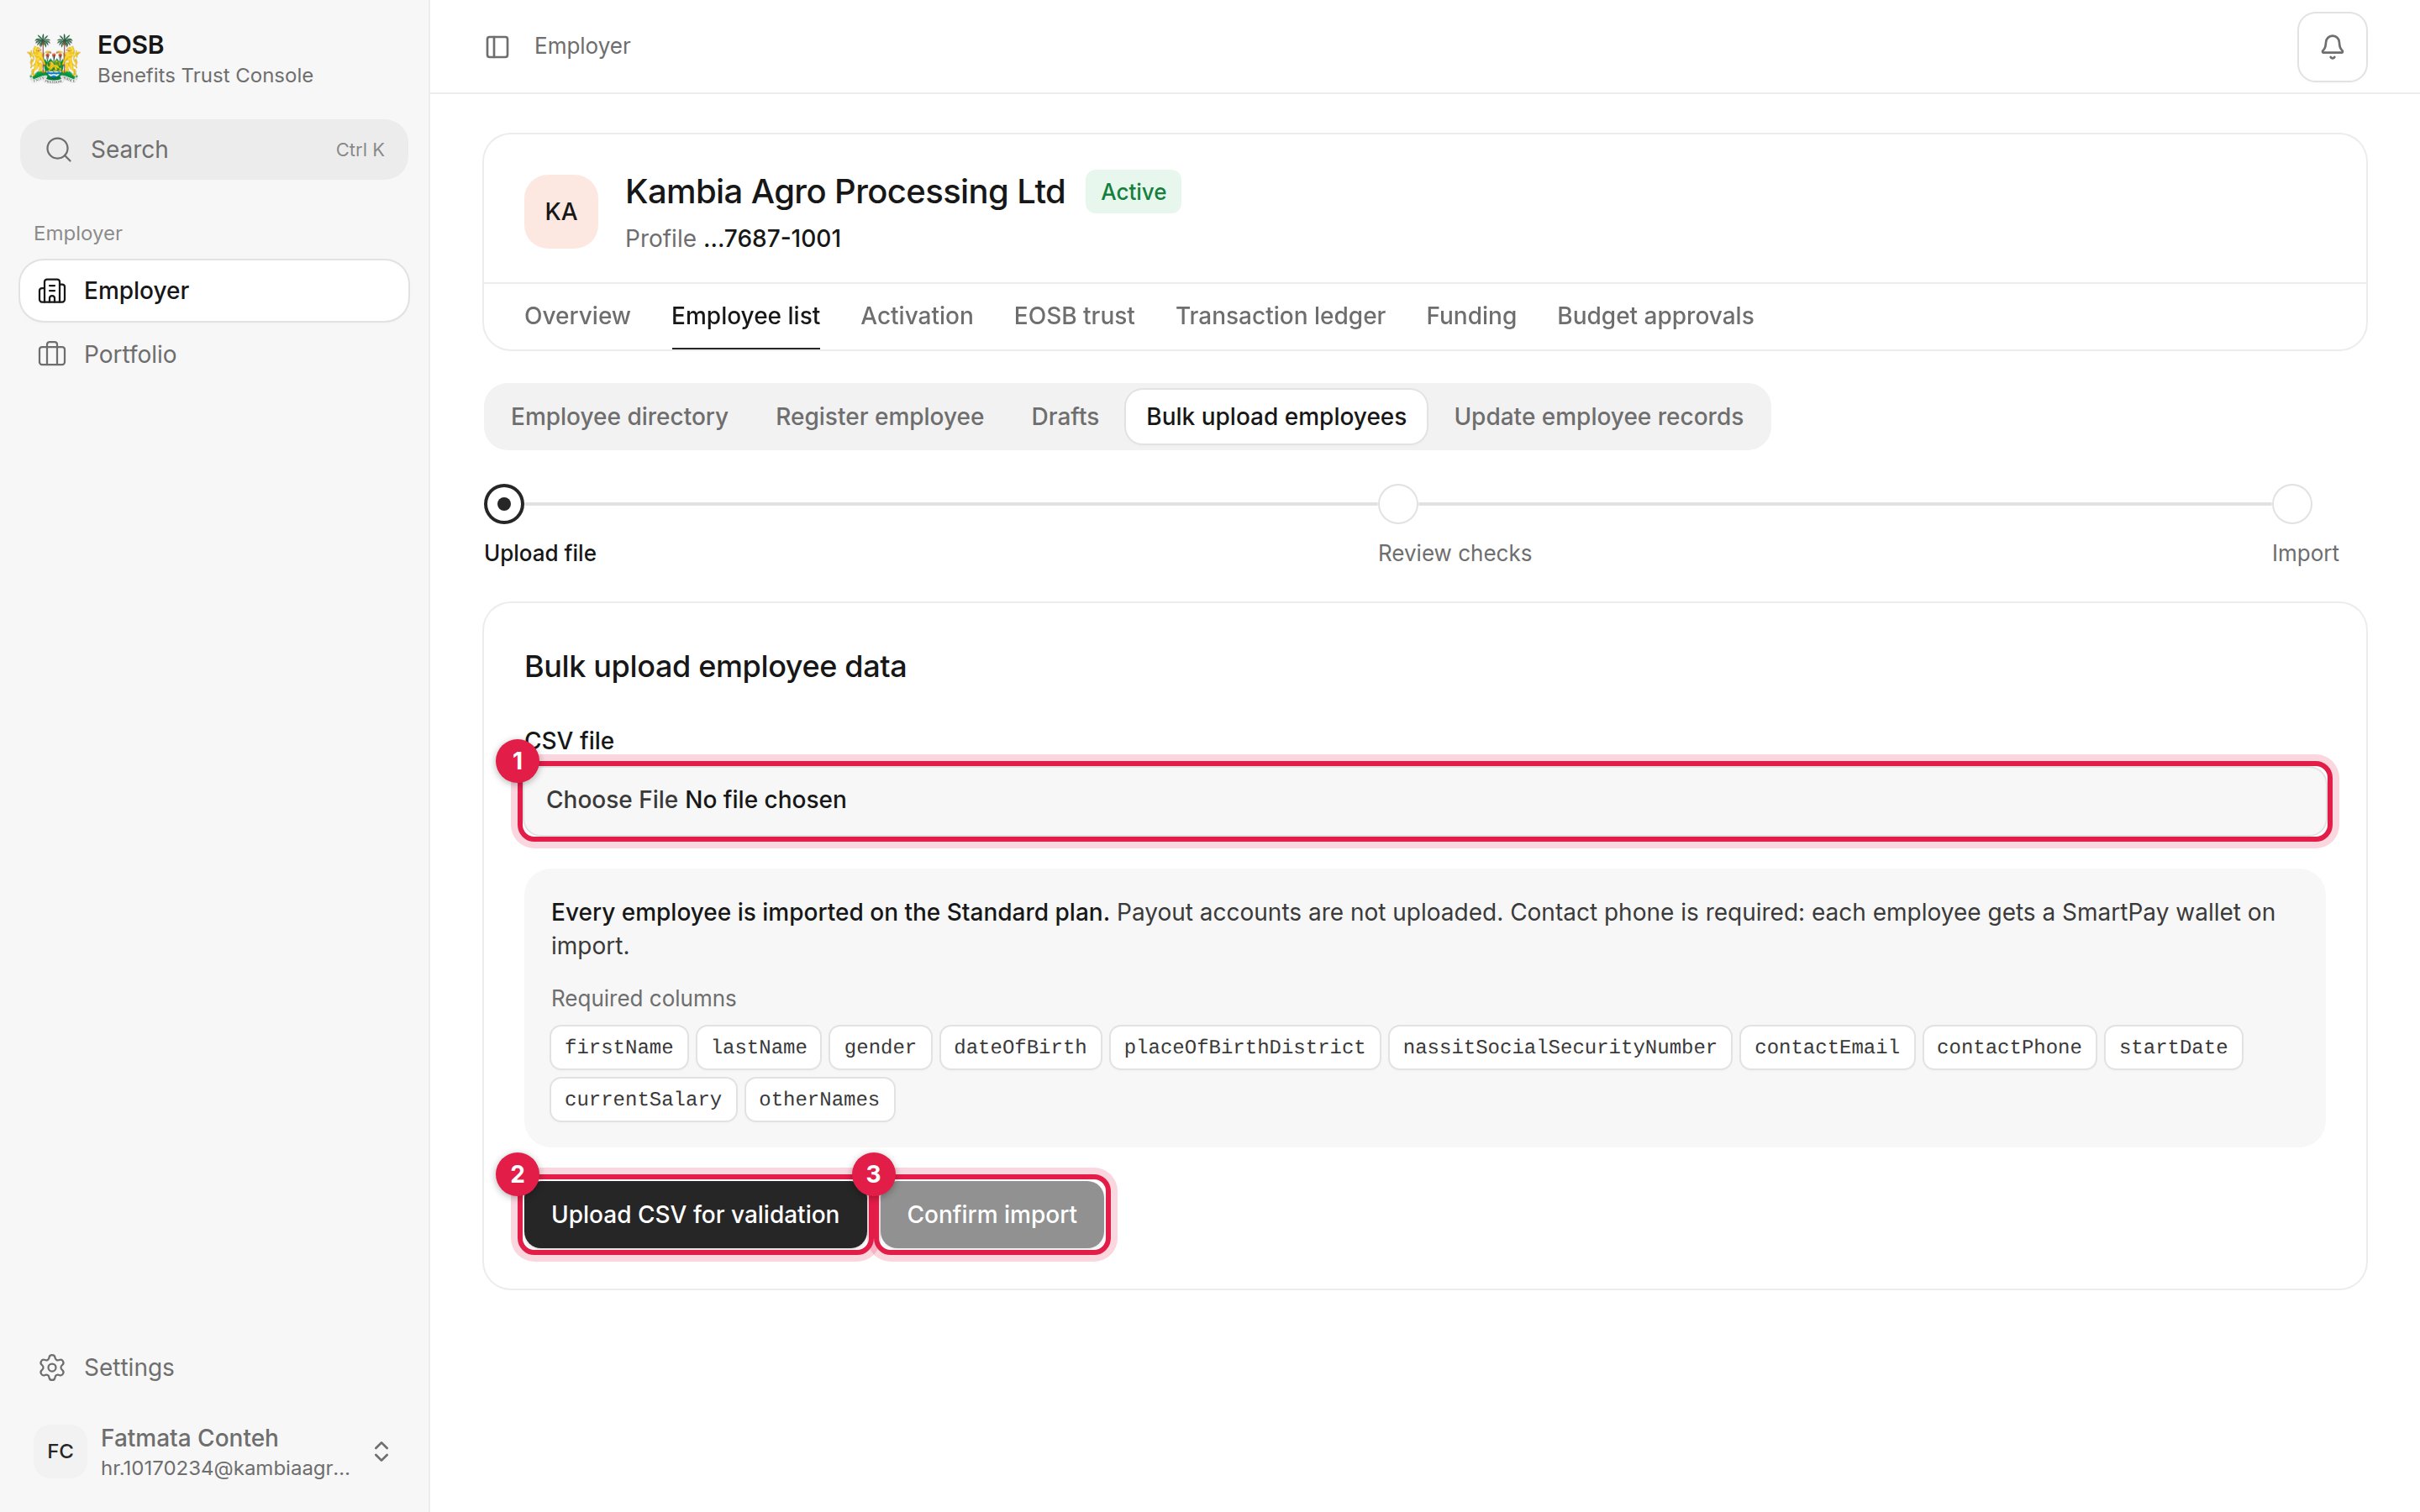 The platform checks every row and shows the result. **Confirm import (3)** stays disabled until there is at least one valid row.
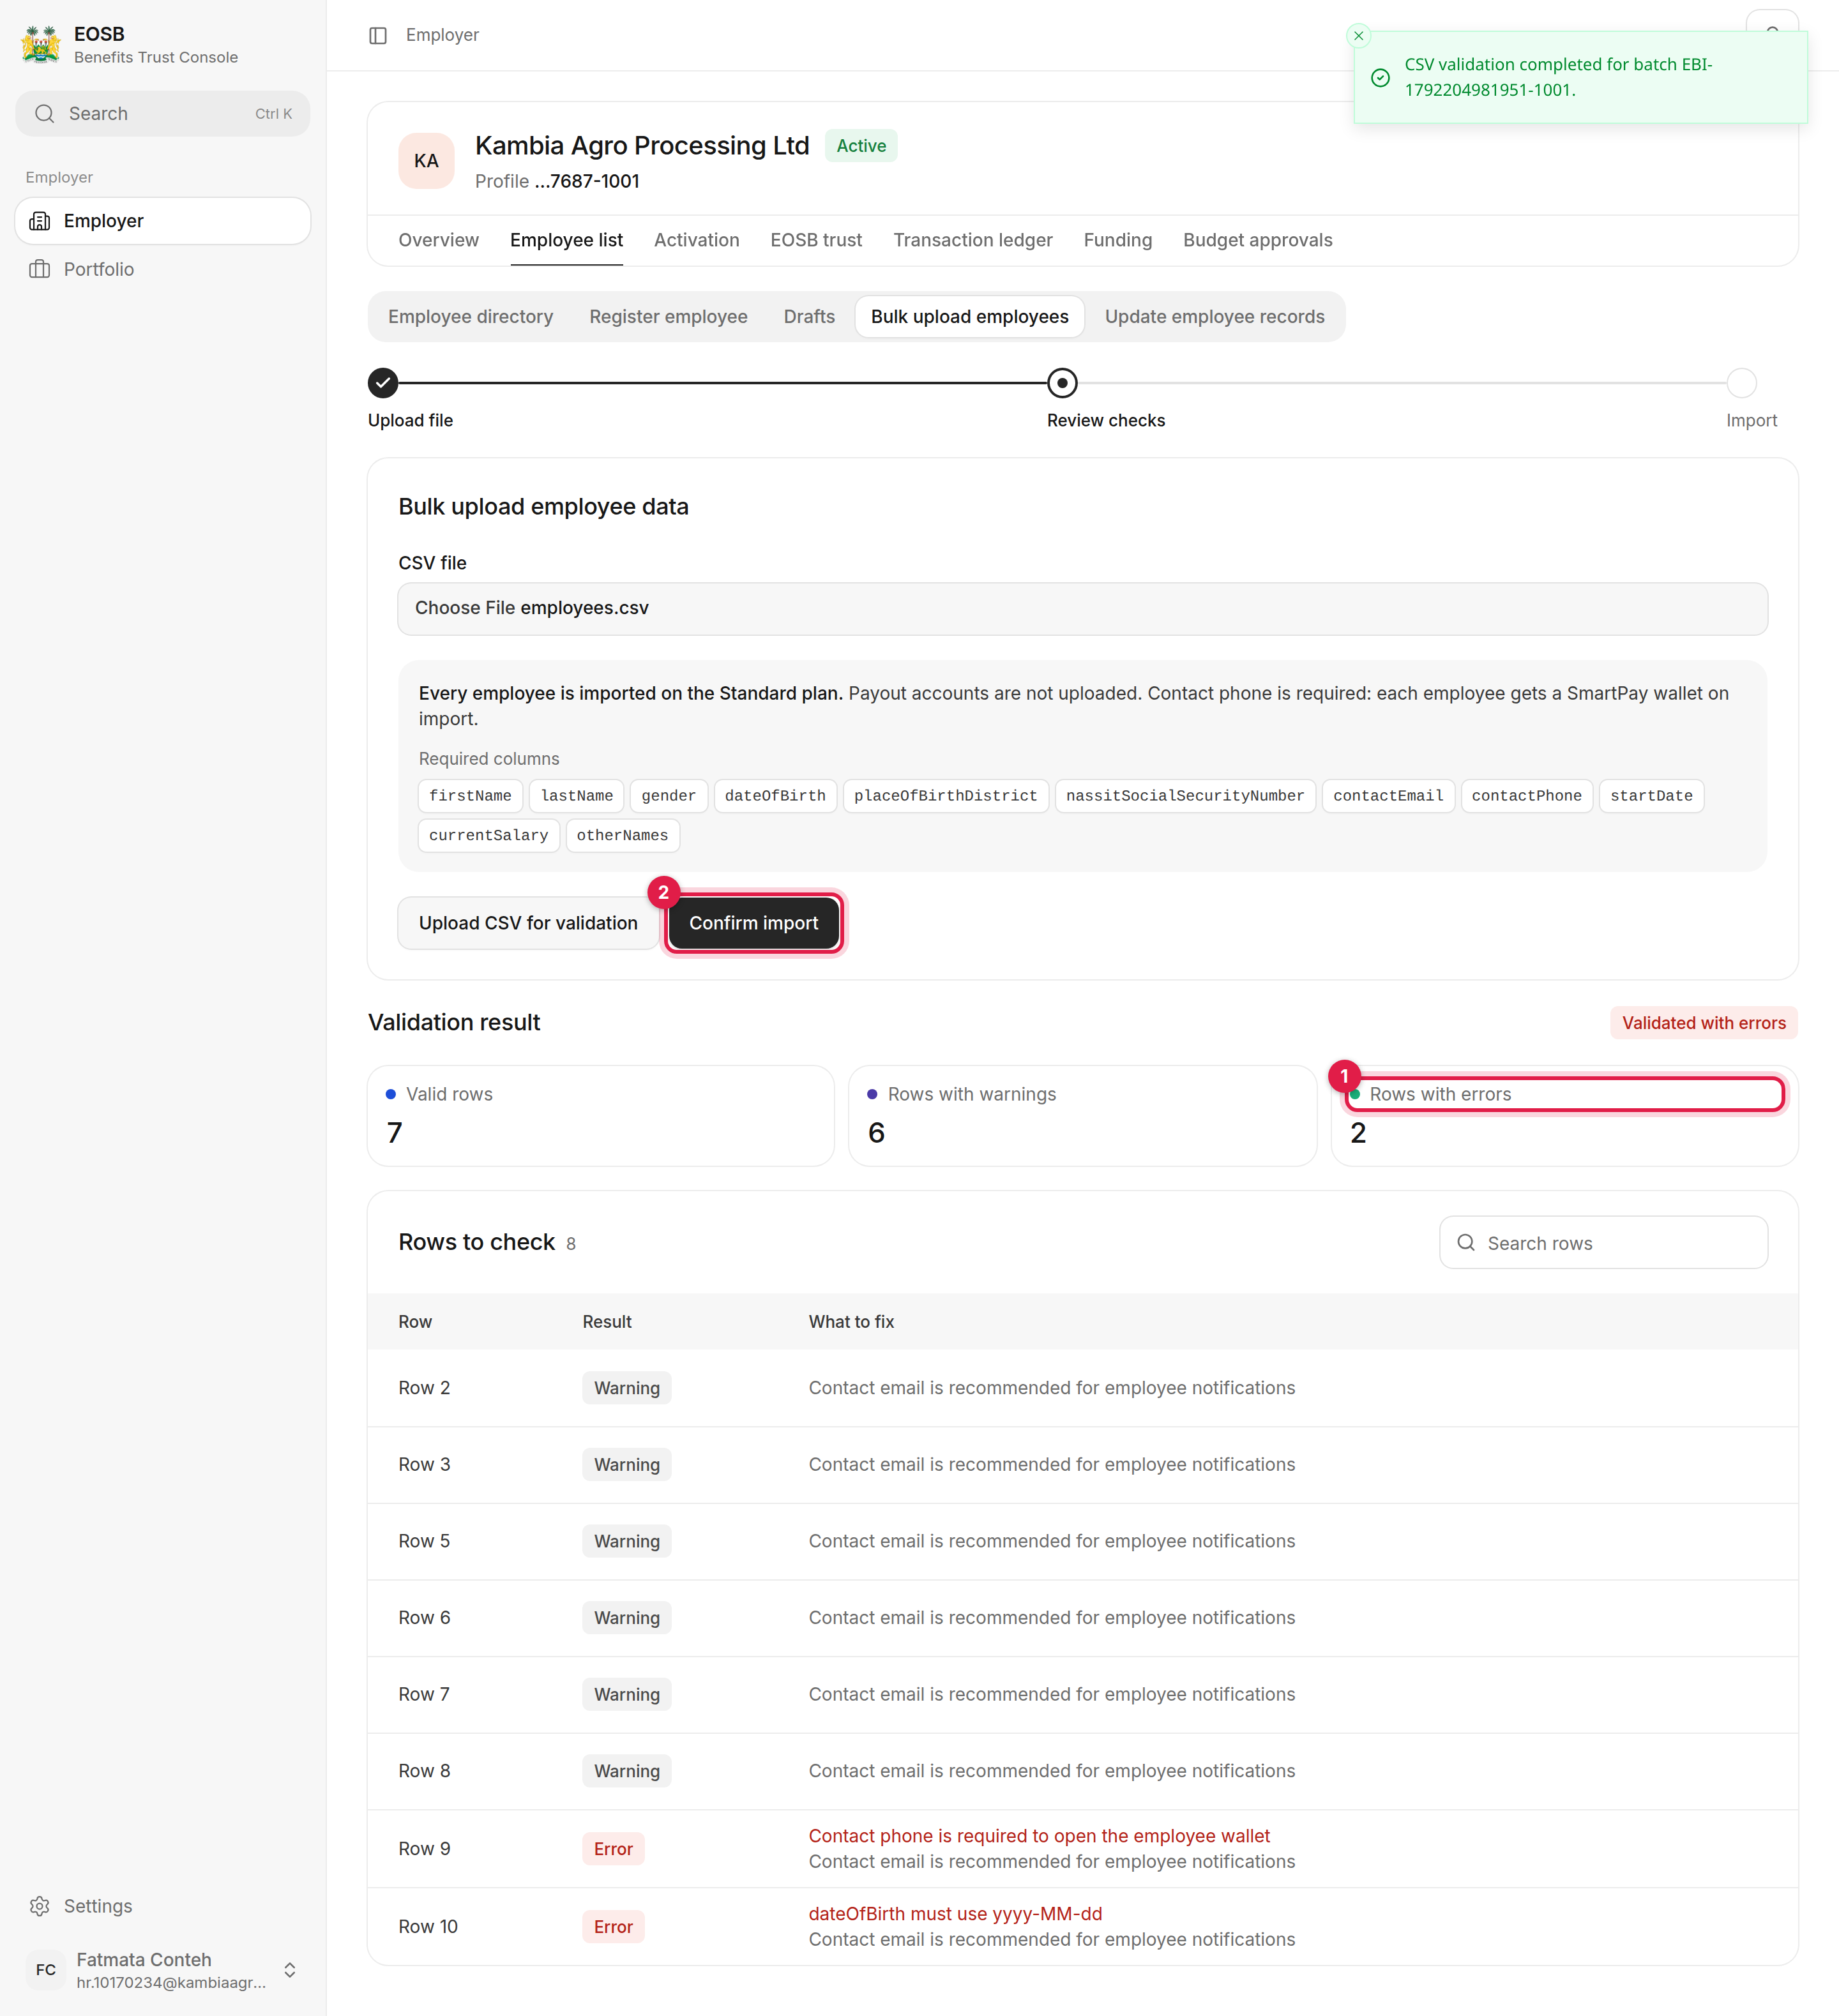 * **Valid rows** will be imported.
* **Rows with warnings** will be imported, but something is worth checking — usually a missing contact email.
* **Rows with errors (1)** will be rejected. The **What to fix** column says why, for example **Contact phone is required to open the employee wallet** or **dateOfBirth must use yyyy-MM-dd**.
To fix errors before importing, correct the file and upload it again.
Valid rows are added to your directory. Rows with errors are rejected.
* **Valid rows** will be imported.
* **Rows with warnings** will be imported, but something is worth checking — usually a missing contact email.
* **Rows with errors (1)** will be rejected. The **What to fix** column says why, for example **Contact phone is required to open the employee wallet** or **dateOfBirth must use yyyy-MM-dd**.
To fix errors before importing, correct the file and upload it again.
Valid rows are added to your directory. Rows with errors are rejected.
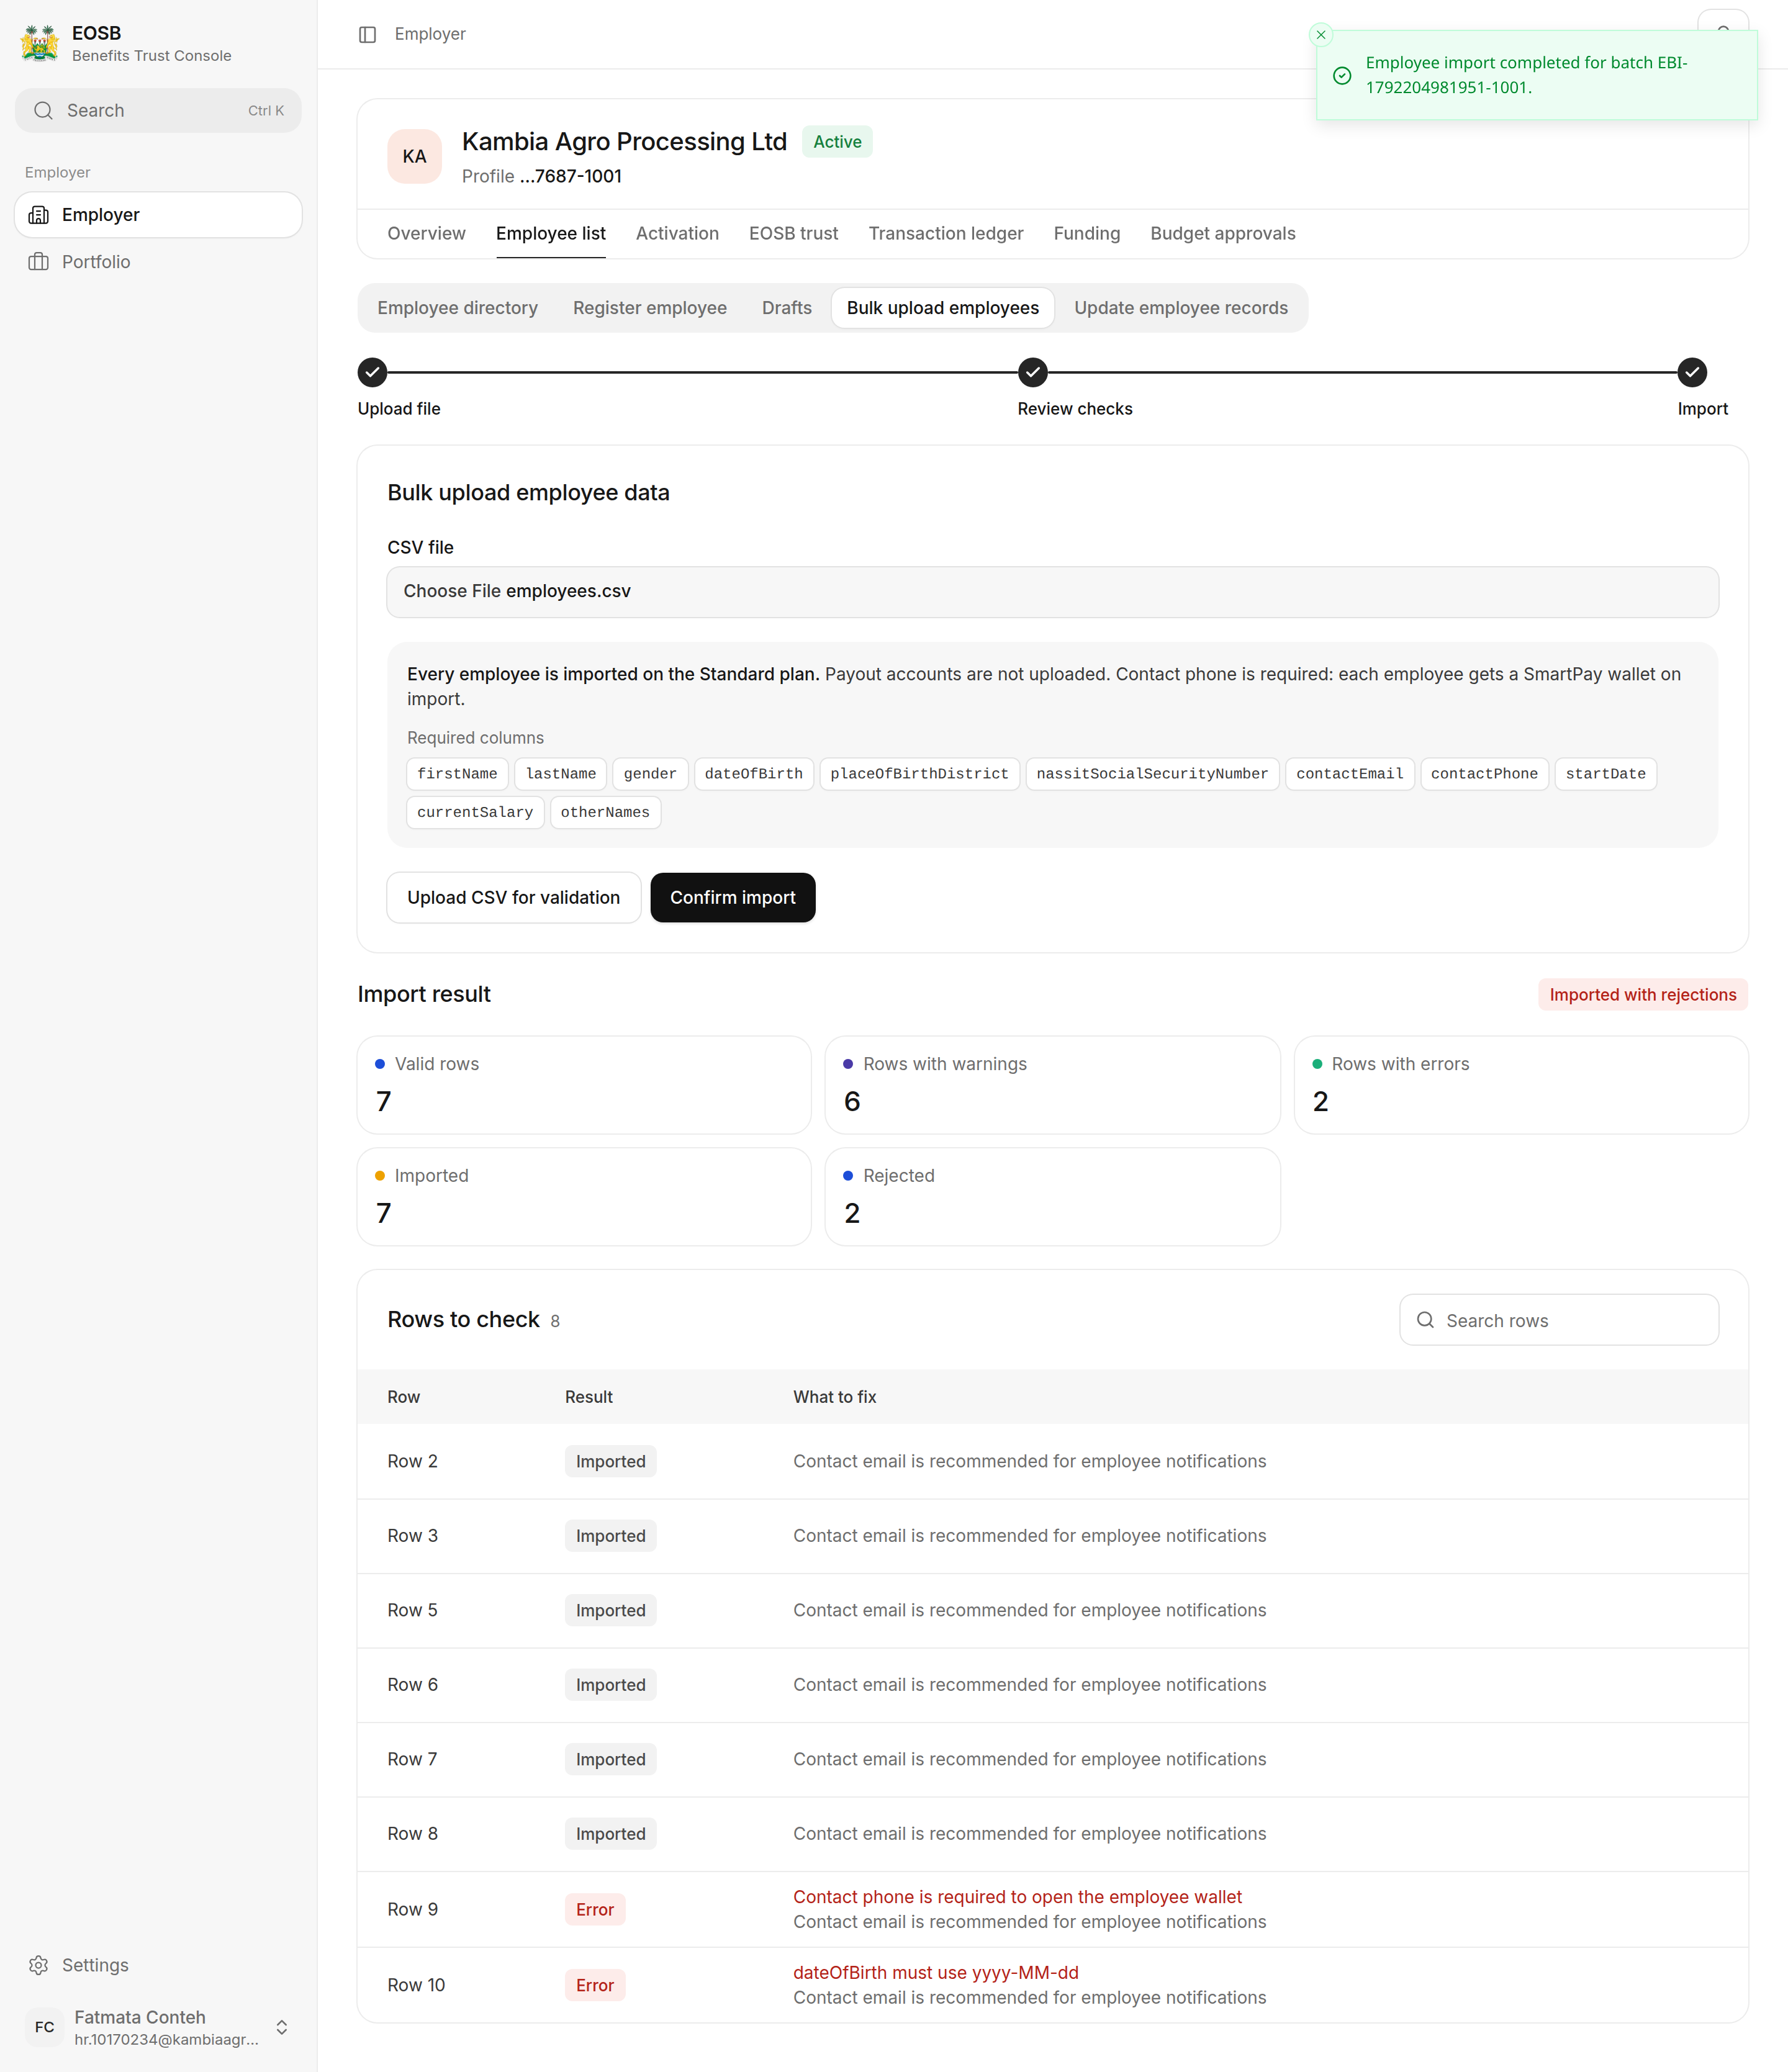 The **Import result** shows how many rows were imported and rejected. To add the rejected employees, fix their rows in a new file and upload it, or [register them one at a time](/employer/employees/register).
## What happens next
Each imported employee is treated exactly as if you had [registered them one at a time](/employer/employees/register#what-happens-next): they are assigned to your trust, their opening balance is calculated and a SmartPay wallet is opened on their phone number. Check the [directory](/employer/employees/directory) to confirm.
This documentation is built and hosted on [Mintlify](https://mintlify.com), a developer documentation platform.
The **Import result** shows how many rows were imported and rejected. To add the rejected employees, fix their rows in a new file and upload it, or [register them one at a time](/employer/employees/register).
## What happens next
Each imported employee is treated exactly as if you had [registered them one at a time](/employer/employees/register#what-happens-next): they are assigned to your trust, their opening balance is calculated and a SmartPay wallet is opened on their phone number. Check the [directory](/employer/employees/directory) to confirm.
This documentation is built and hosted on [Mintlify](https://mintlify.com), a developer documentation platform.